Relief
Nut
Action
Intonation
Setup
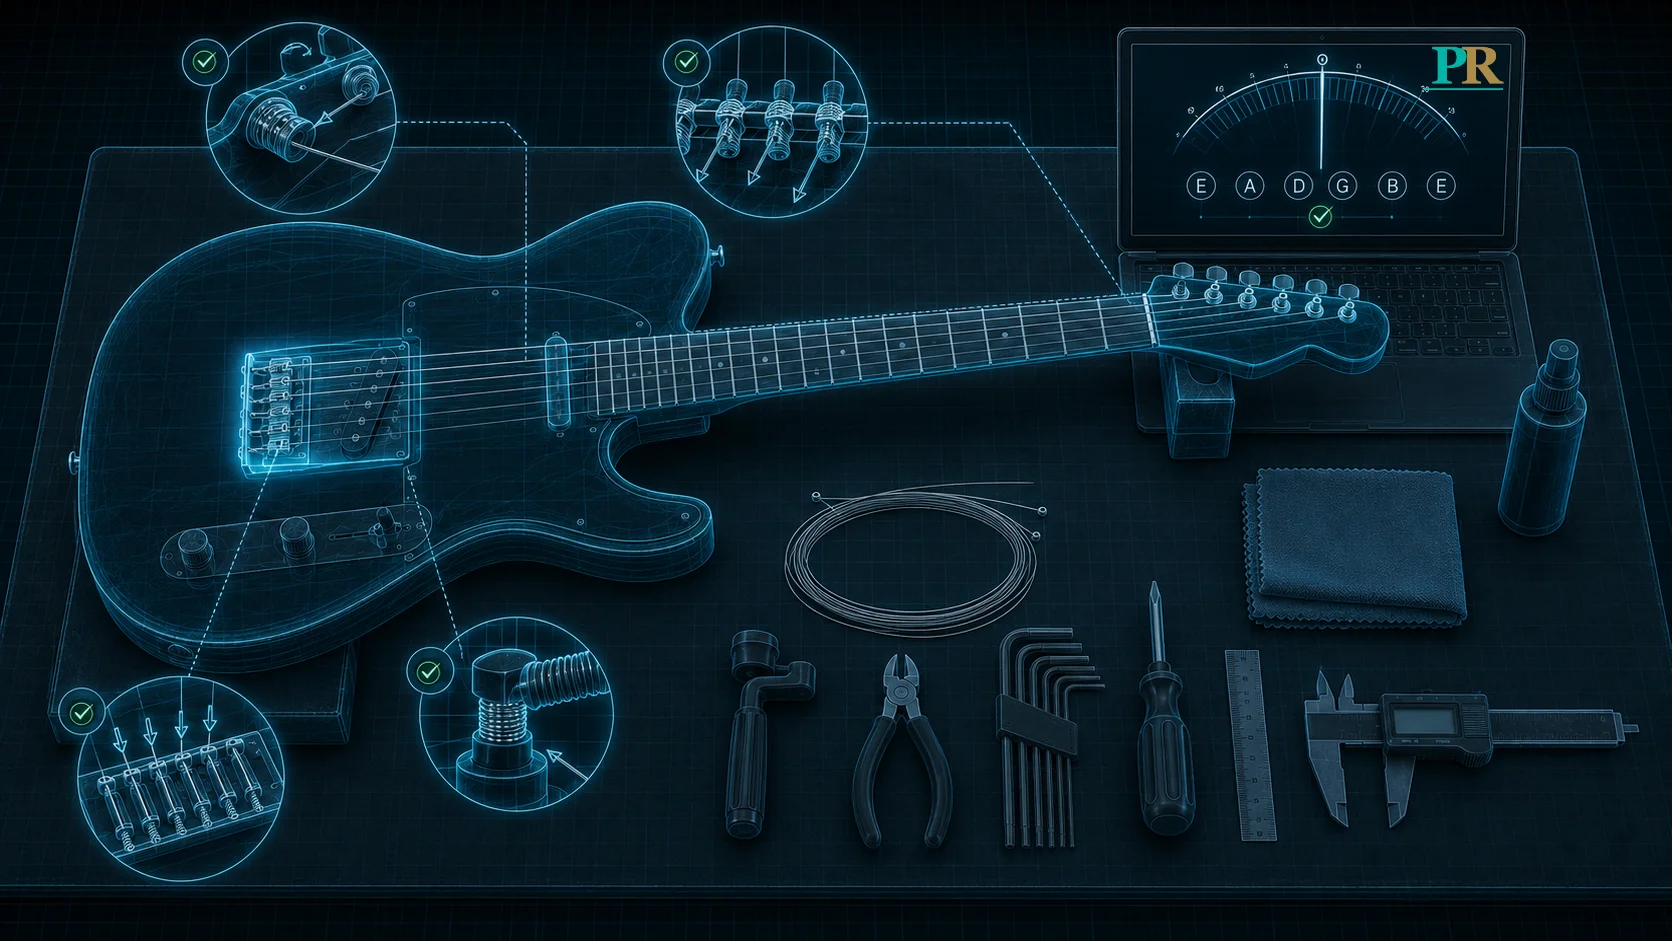
Pocket RoadyTool Stack Deluxe
Power
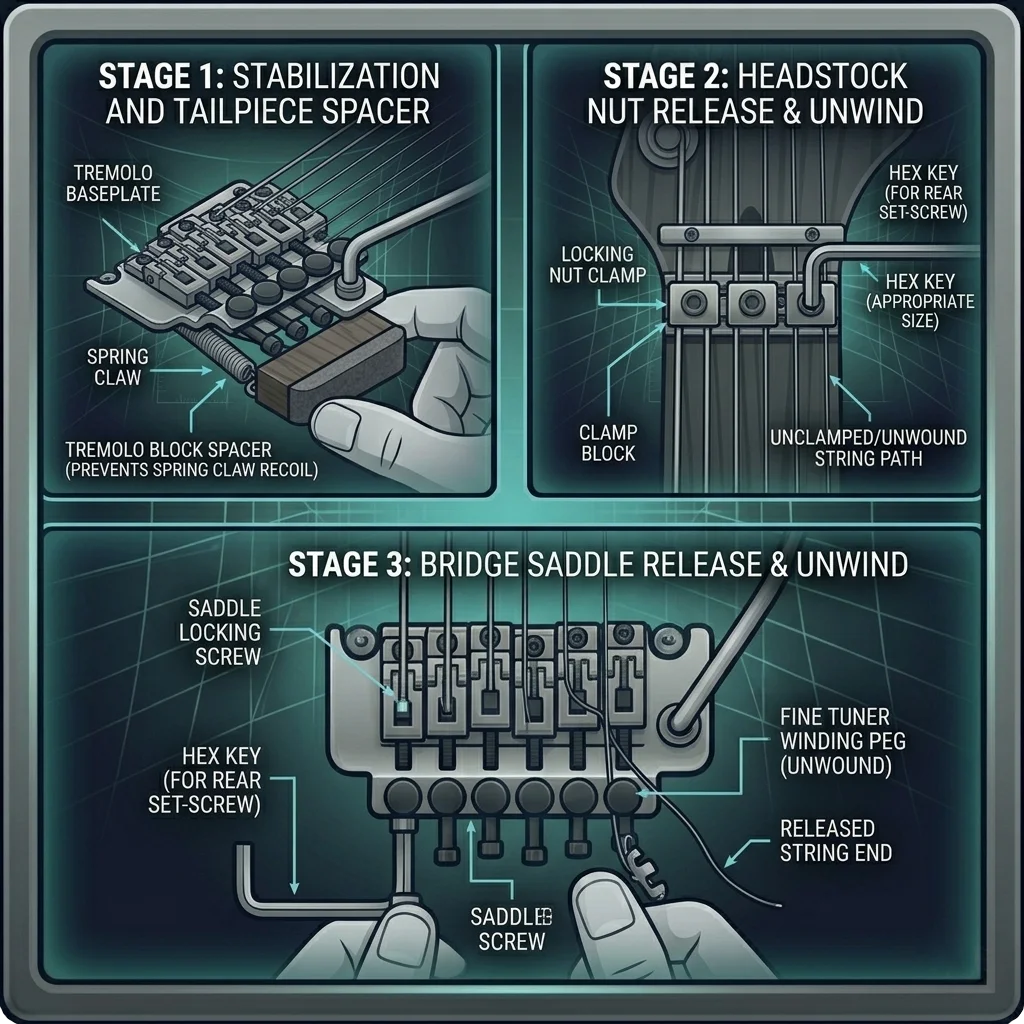
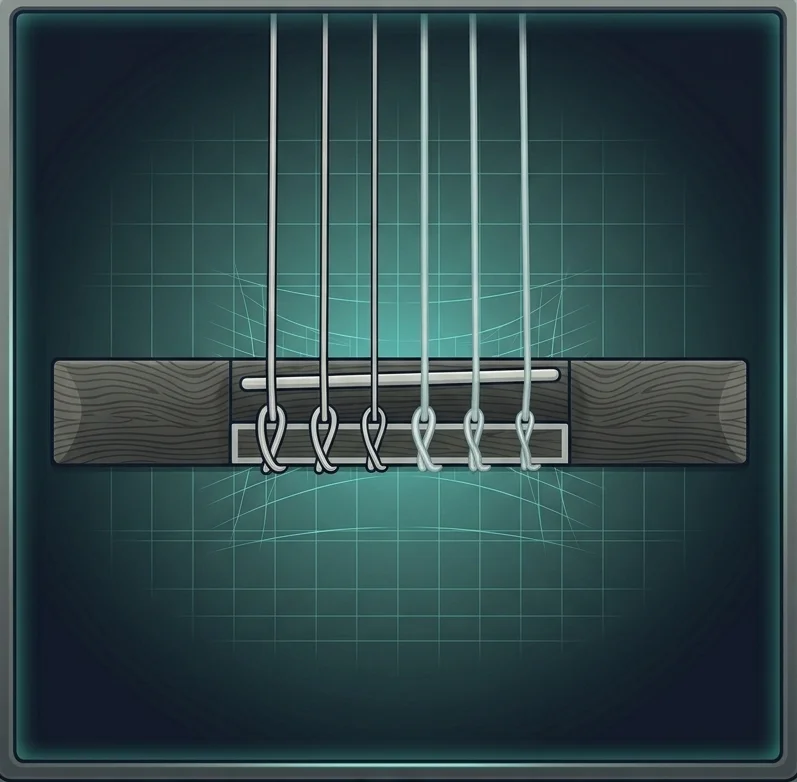
String Change Assistant
Let’s change your strings the right way.
Step-by-step string change guide tailored to your guitar. Electric, acoustic, or classical — the right instructions for your bridge type, every time.
Takes about 10–15 minutes