Bridge Guide
Tune-O-Matic Bridge Intonation Guide
The Tune-O-Matic bridge is one of the most common fixed-bridge designs on Gibson-style guitars, and it is usually straightforward once you understand its quirks. If you already know the basic intonation process, this page is about the mechanics of working with a TOM bridge in the real world.
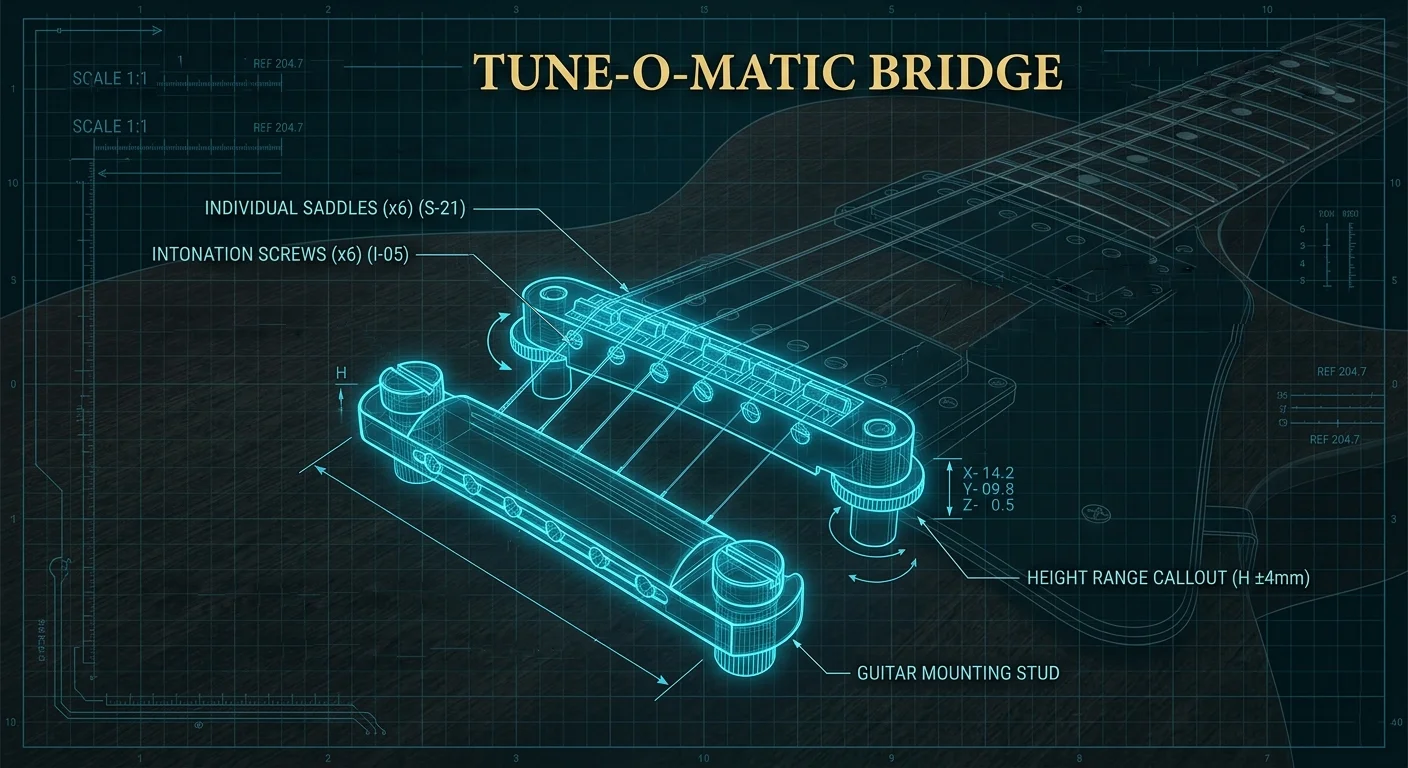
Identify Your Bridge First
Before you adjust anything, take a look at the bridge layout.
- Nashville style bridges are common on modern Gibsons. The saddle adjustment screws usually face the tailpiece, and the design gives you a bit more travel.
- ABR-1 style bridges are the vintage-style version. The adjustment screws usually face the pickups, and the bridge tends to have less overall saddle travel.
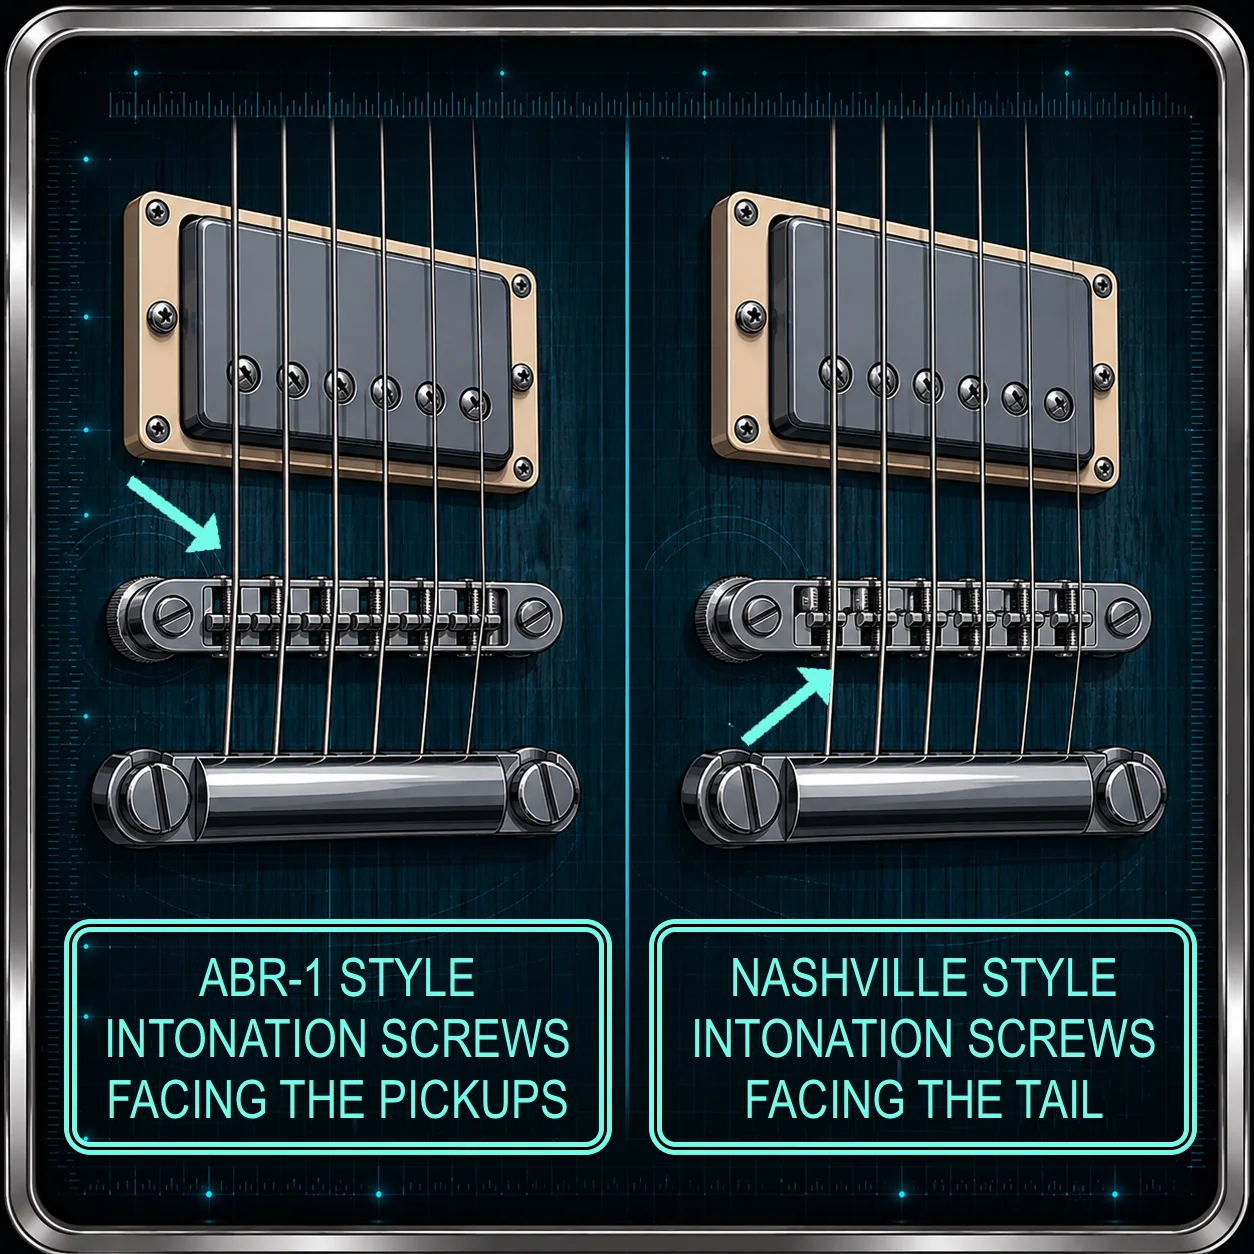
If a previous owner installed the bridge backwards, that is not unusual. The intonation logic stays the same, but access to the screws may feel awkward.
When a Saddle Flip Helps
Sometimes a saddle runs out of travel before the string intonates correctly. When that happens, one useful workaround is to flip the saddle so the flat side faces the direction you need more room.
That can give you a little extra adjustment range, which is often enough to solve a stubborn string, especially on a thick low E. Use this as a troubleshooting step when normal saddle movement is not enough.
Do not flip a saddle just because it looks wrong. Only do it when you actually need more travel in one direction.
Saddle Orientation in Practice
Do not worry if all the saddles do not face the same way. On many factory setups, the orientation is staggered to help maximize adjustment range.
The direction of the saddle only matters when you run out of room. If the saddle cannot move far enough in the direction you need, that is when a flip becomes useful.
- High strings (e, B, G): Usually sloped toward the tailpiece to allow the saddle to move closer to the neck.
- Low strings (D, A, E): Usually sloped toward the neck to allow the saddle more room to move back toward the tailpiece.
Watch the Hardware
A few small problems can get in the way of a clean setup. Worth keeping in mind as you work:
- Use a long-shaft screwdriver so your hand and tool stay farther from the guitar top.
- If you hear a small rattle, check the retaining wire across the screws.
- Do not force a saddle screw under full string tension.
- If a screw head starts to strip, stop and reset before making it worse.
Most TOM hardware problems are easier to solve early. If something feels stuck, back off and inspect it before forcing the adjustment.
The Intonation Workflow
Tune the guitar to pitch.
Check the open string against the fretted 12th fret note.
If the fretted note is sharp, move the saddle back.
If the fretted note is flat, move the saddle forward.
Retune.
Recheck. Repeat until the notes are balanced.
That is the core workflow for any Tune-O-Matic bridge. The adjustments are small, but the order matters.
Keep It Steady
A TOM bridge works best when the parts are seated properly and the bridge is not leaning or shifting around. If the hardware is worn, loose, or bent, you may need to deal with that first before the intonation will behave normally.
Take your time, keep the changes small, and recheck after every move. That is usually enough to get the bridge working the way it should.
Closing Note
The Tune-O-Matic bridge is very manageable once you understand how the hardware affects your travel and access. Identify the bridge style, make small moves, retune every time, and only use a saddle flip when you actually need the extra range.
If the bridge starts fighting you, stop and inspect the hardware before chasing a setup issue that may actually be mechanical.
Next Step
Use the Intonator Tool while you work so you can compare each string cleanly and keep the process moving in the right direction.
Not sure if you actually have an intonation problem? The Guitar Setup Assistant can help you figure out where to start — it walks you through the most common setup issues so you know what to tackle first.
Ready to check your intonation?
Open the Intonator Tool →