Practice Guide
Decoding the Fretboard: Scales Without Memorizing Shapes
You do not need to memorize endless scale boxes to understand the fretboard. Learn how intervals turn the neck into a clear, repeatable map.
If you have spent any time trying to learn lead guitar, you have probably run into the same problem: a wall of scale boxes that feels more like a maze than a map. You memorize a shape, move it around the neck, and hope it works. But when it is time to improvise, the pattern can feel disconnected from the music.

The good news is that you do not need to memorize endless shapes to understand the fretboard. Once you start seeing intervals instead of boxes, the neck becomes much easier to navigate. The whole point is to understand why the notes work, not just where your fingers happen to land.
The fretboard is a grid
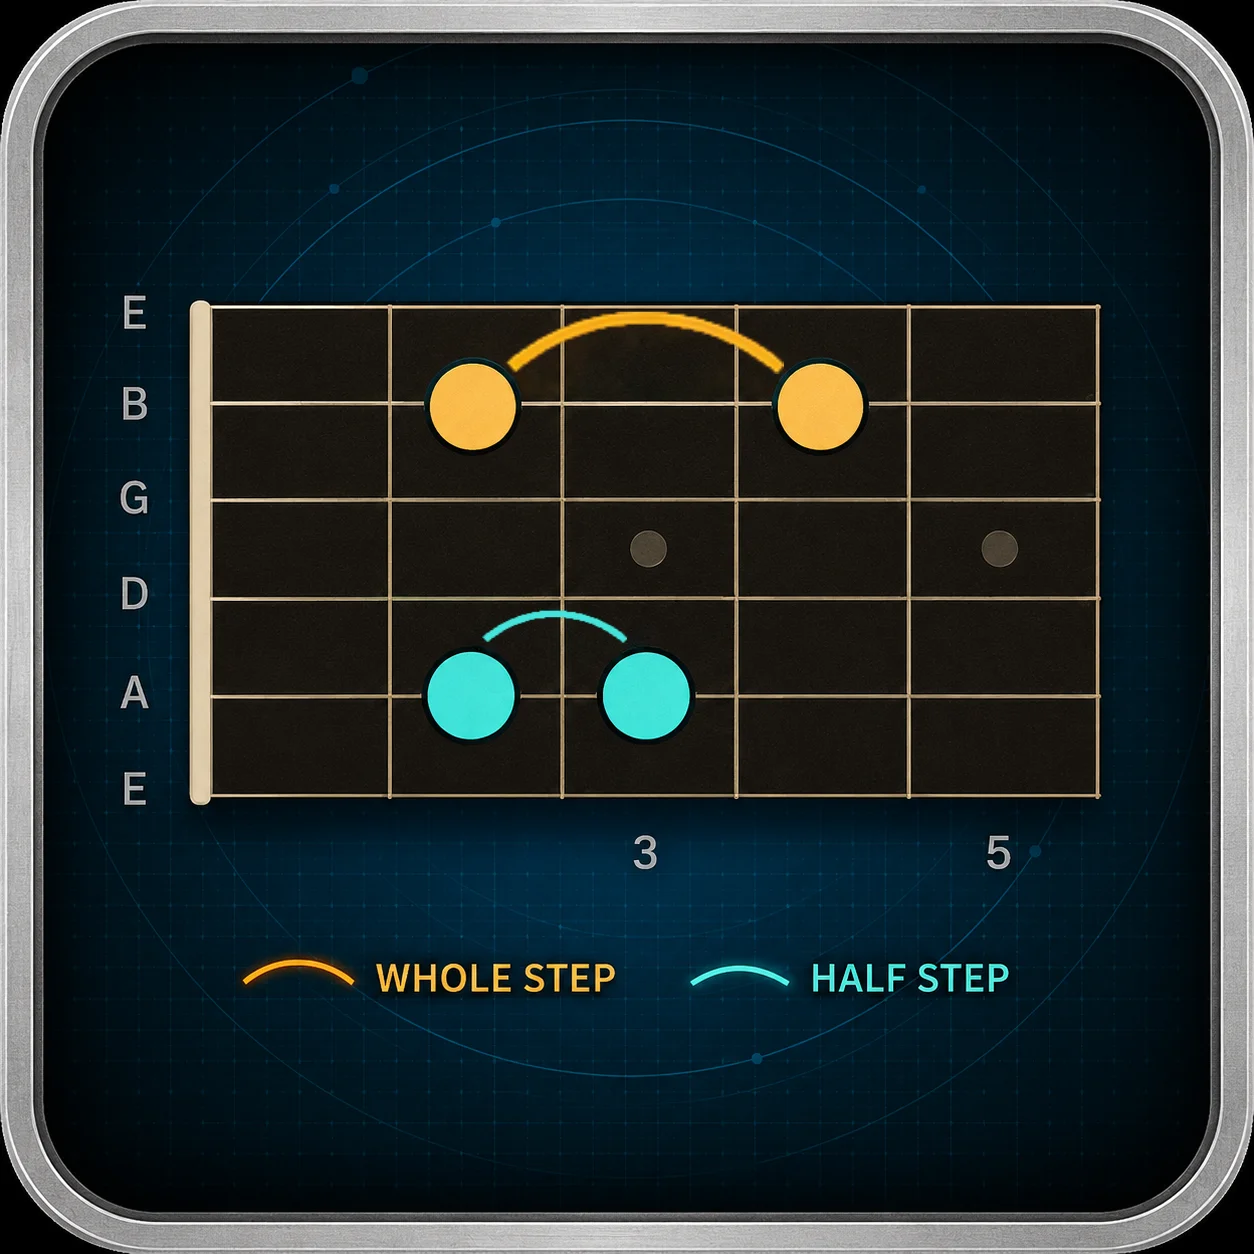
Every scale and arpeggio is built from intervals — the distances between notes. On guitar, those distances are physical and repeatable. One fret is a half step. Two frets are a whole step.
That means a scale is not really a shape at all. It is a pattern of distances. If you know the formula, you can start on any root note and build the sound from there instead of hunting for a box diagram.
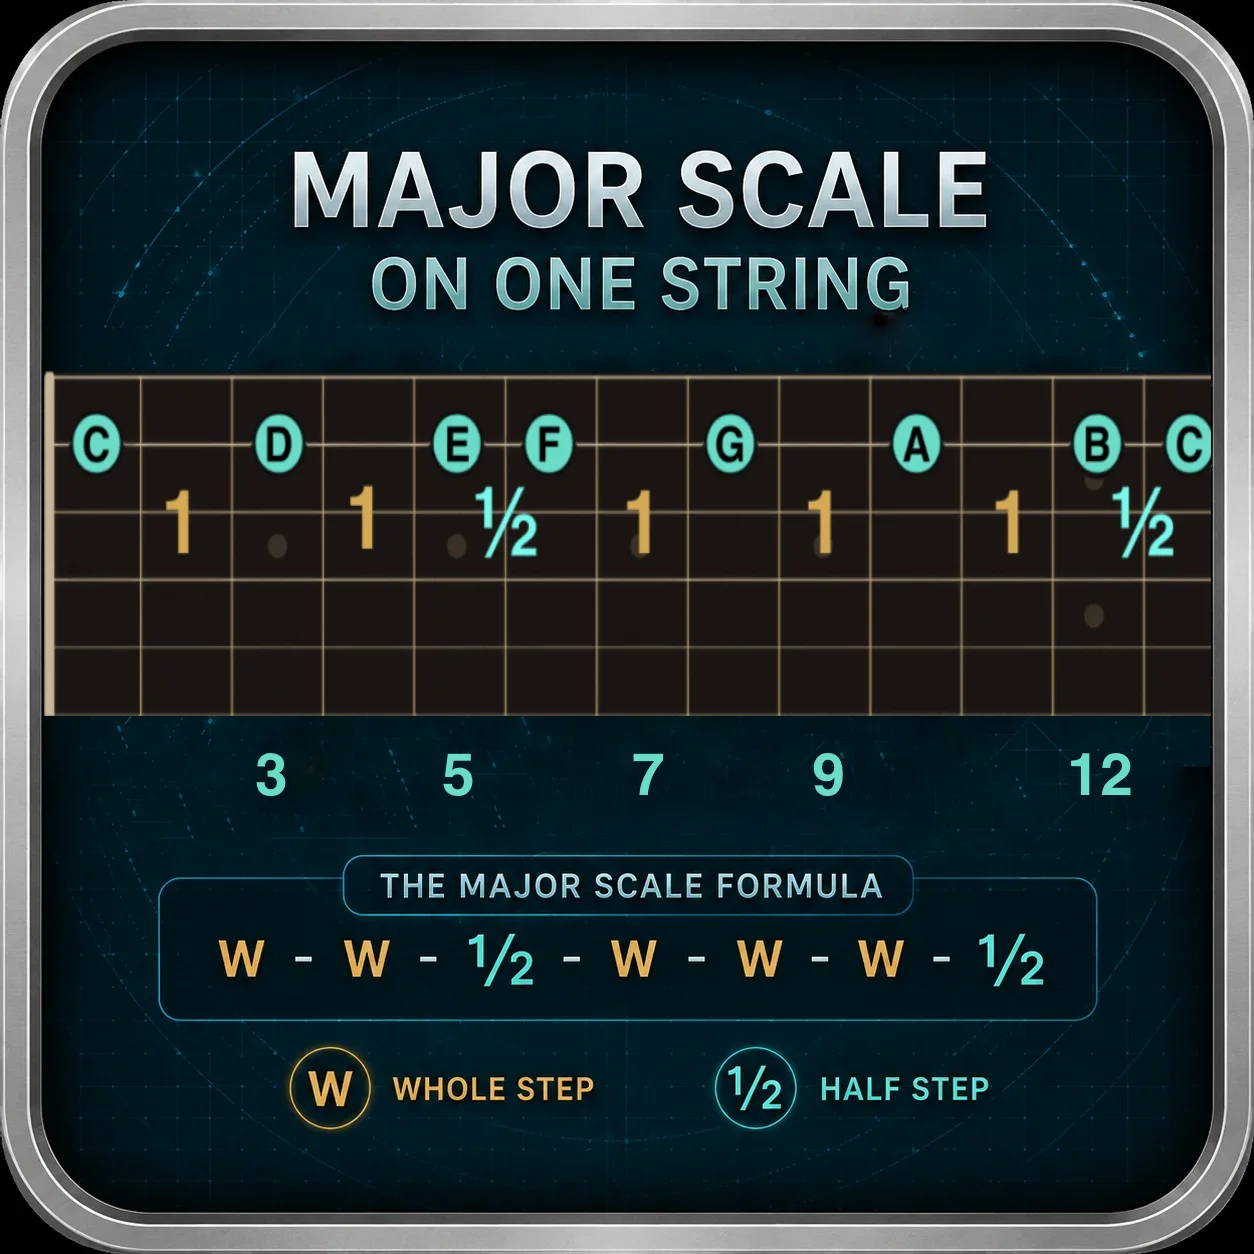
The major scale formula
The major scale follows a fixed interval pattern: whole, whole, half, whole, whole, whole, half. Once you understand that, you can build the scale anywhere on the neck without needing to memorize a page of diagrams.
This is the real shift in thinking. Instead of asking "Which box am I in?" you start asking "What is the interval pattern from this root?" That small change opens up the whole neck.

Move horizontally
A lot of players get stuck because they only think vertically. They learn scale shapes that move across strings, but they never practice how the scale flows along one string. That makes the neck feel fragmented.
A better approach is to start with a single string and follow the interval formula up the neck. That helps you see how notes connect in a line instead of a box. Once that becomes natural, the fretboard starts to feel like a continuous map rather than a set of disconnected zones.
Learn the universal intervals
Once you understand the grid, some of the most useful shapes stop being shapes and start being relationships. A perfect fifth is always one string down and two frets up. An octave is always two strings down and two frets up.
Those patterns matter because they show up everywhere: in power chords, melodies, arpeggios, and scale navigation. When your hands start recognizing them, you stop thinking like a diagram reader and start thinking like a musician.

Two strings down, two frets up. Shows up in every position on the neck.
One string down, two frets up. The foundation of power chords and arpeggios.
Your anchor. Once you find the root, everything else is a measured distance away.
Use the overlay
This is exactly where the Scale & Arpeggio Overlay helps. Instead of trying to picture the whole neck in your head, you can see the scale degrees and arpeggios lit up in real time. That makes the interval logic visible instead of abstract.
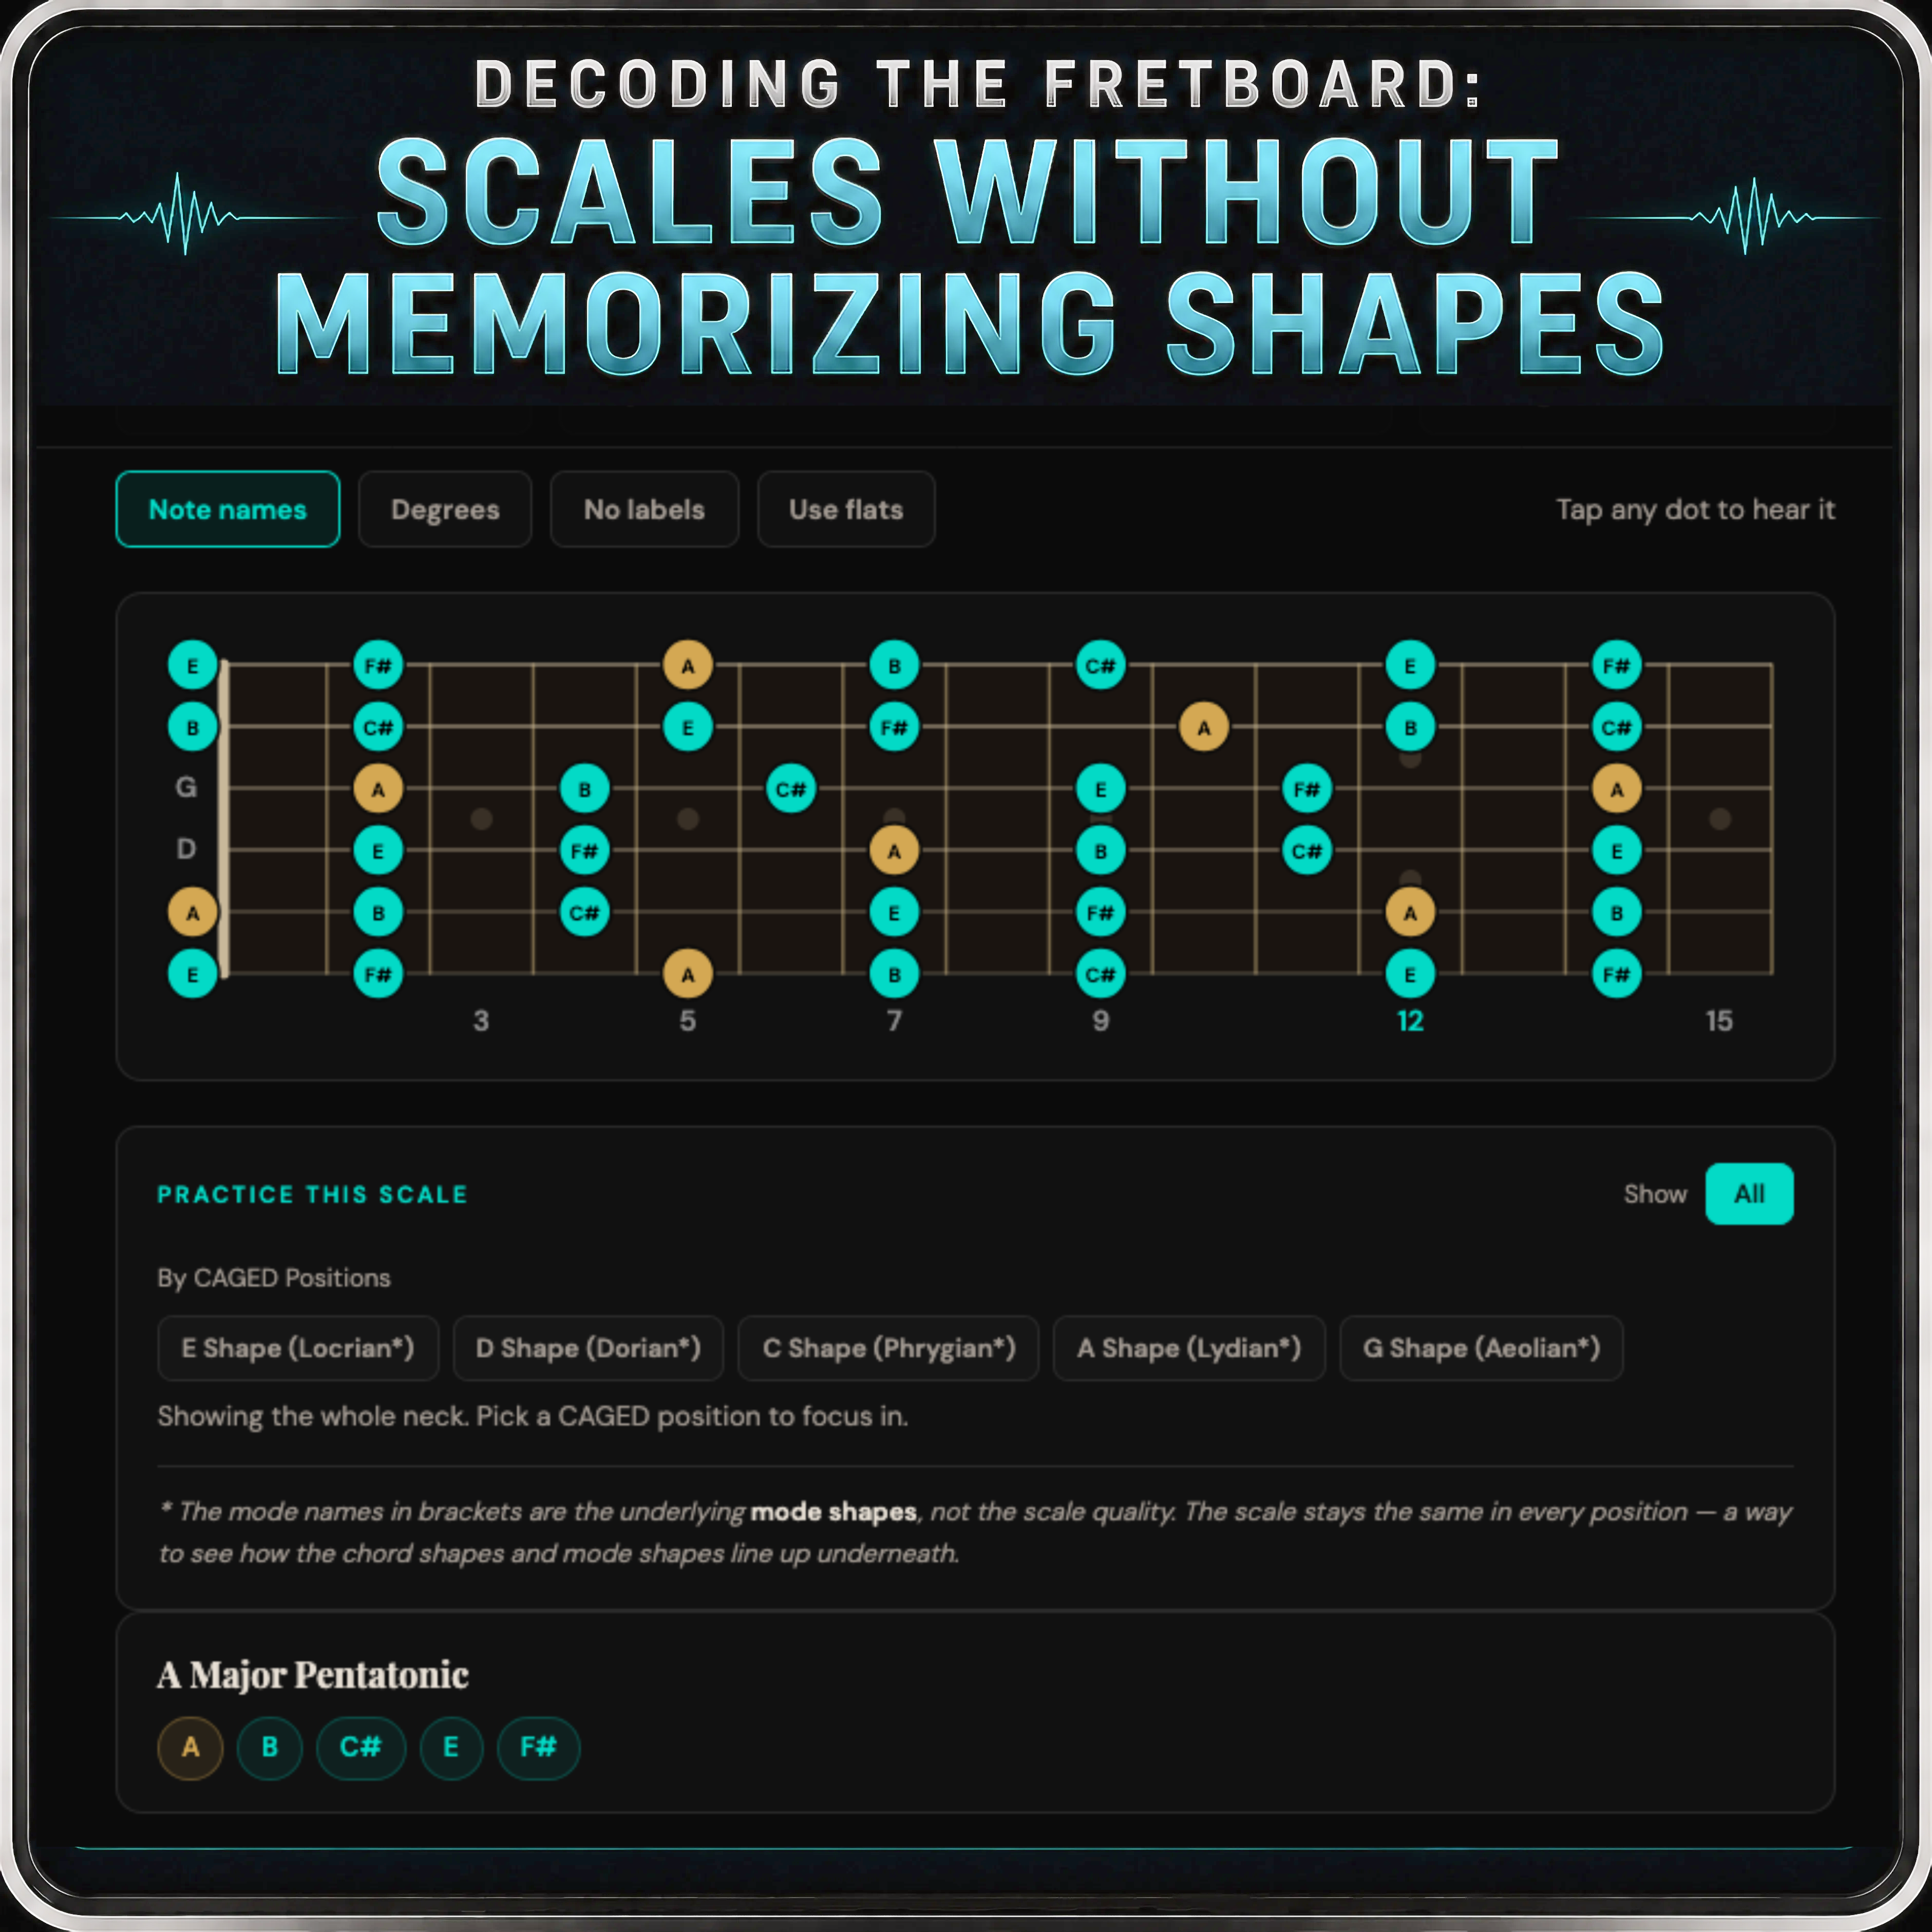
If you are learning a new key, a new scale, or a new arpeggio, the overlay turns the fretboard into a living map. Switch between note names and scale degrees to connect what you hear with what you see — that combination builds real fretboard knowledge faster than memorizing shapes ever will.
Want to see the pattern instead of guessing the shape? Open the overlay and switch between scale degrees, intervals, and arpeggios in real time.
Open the Overlay →The Pocket Roady order
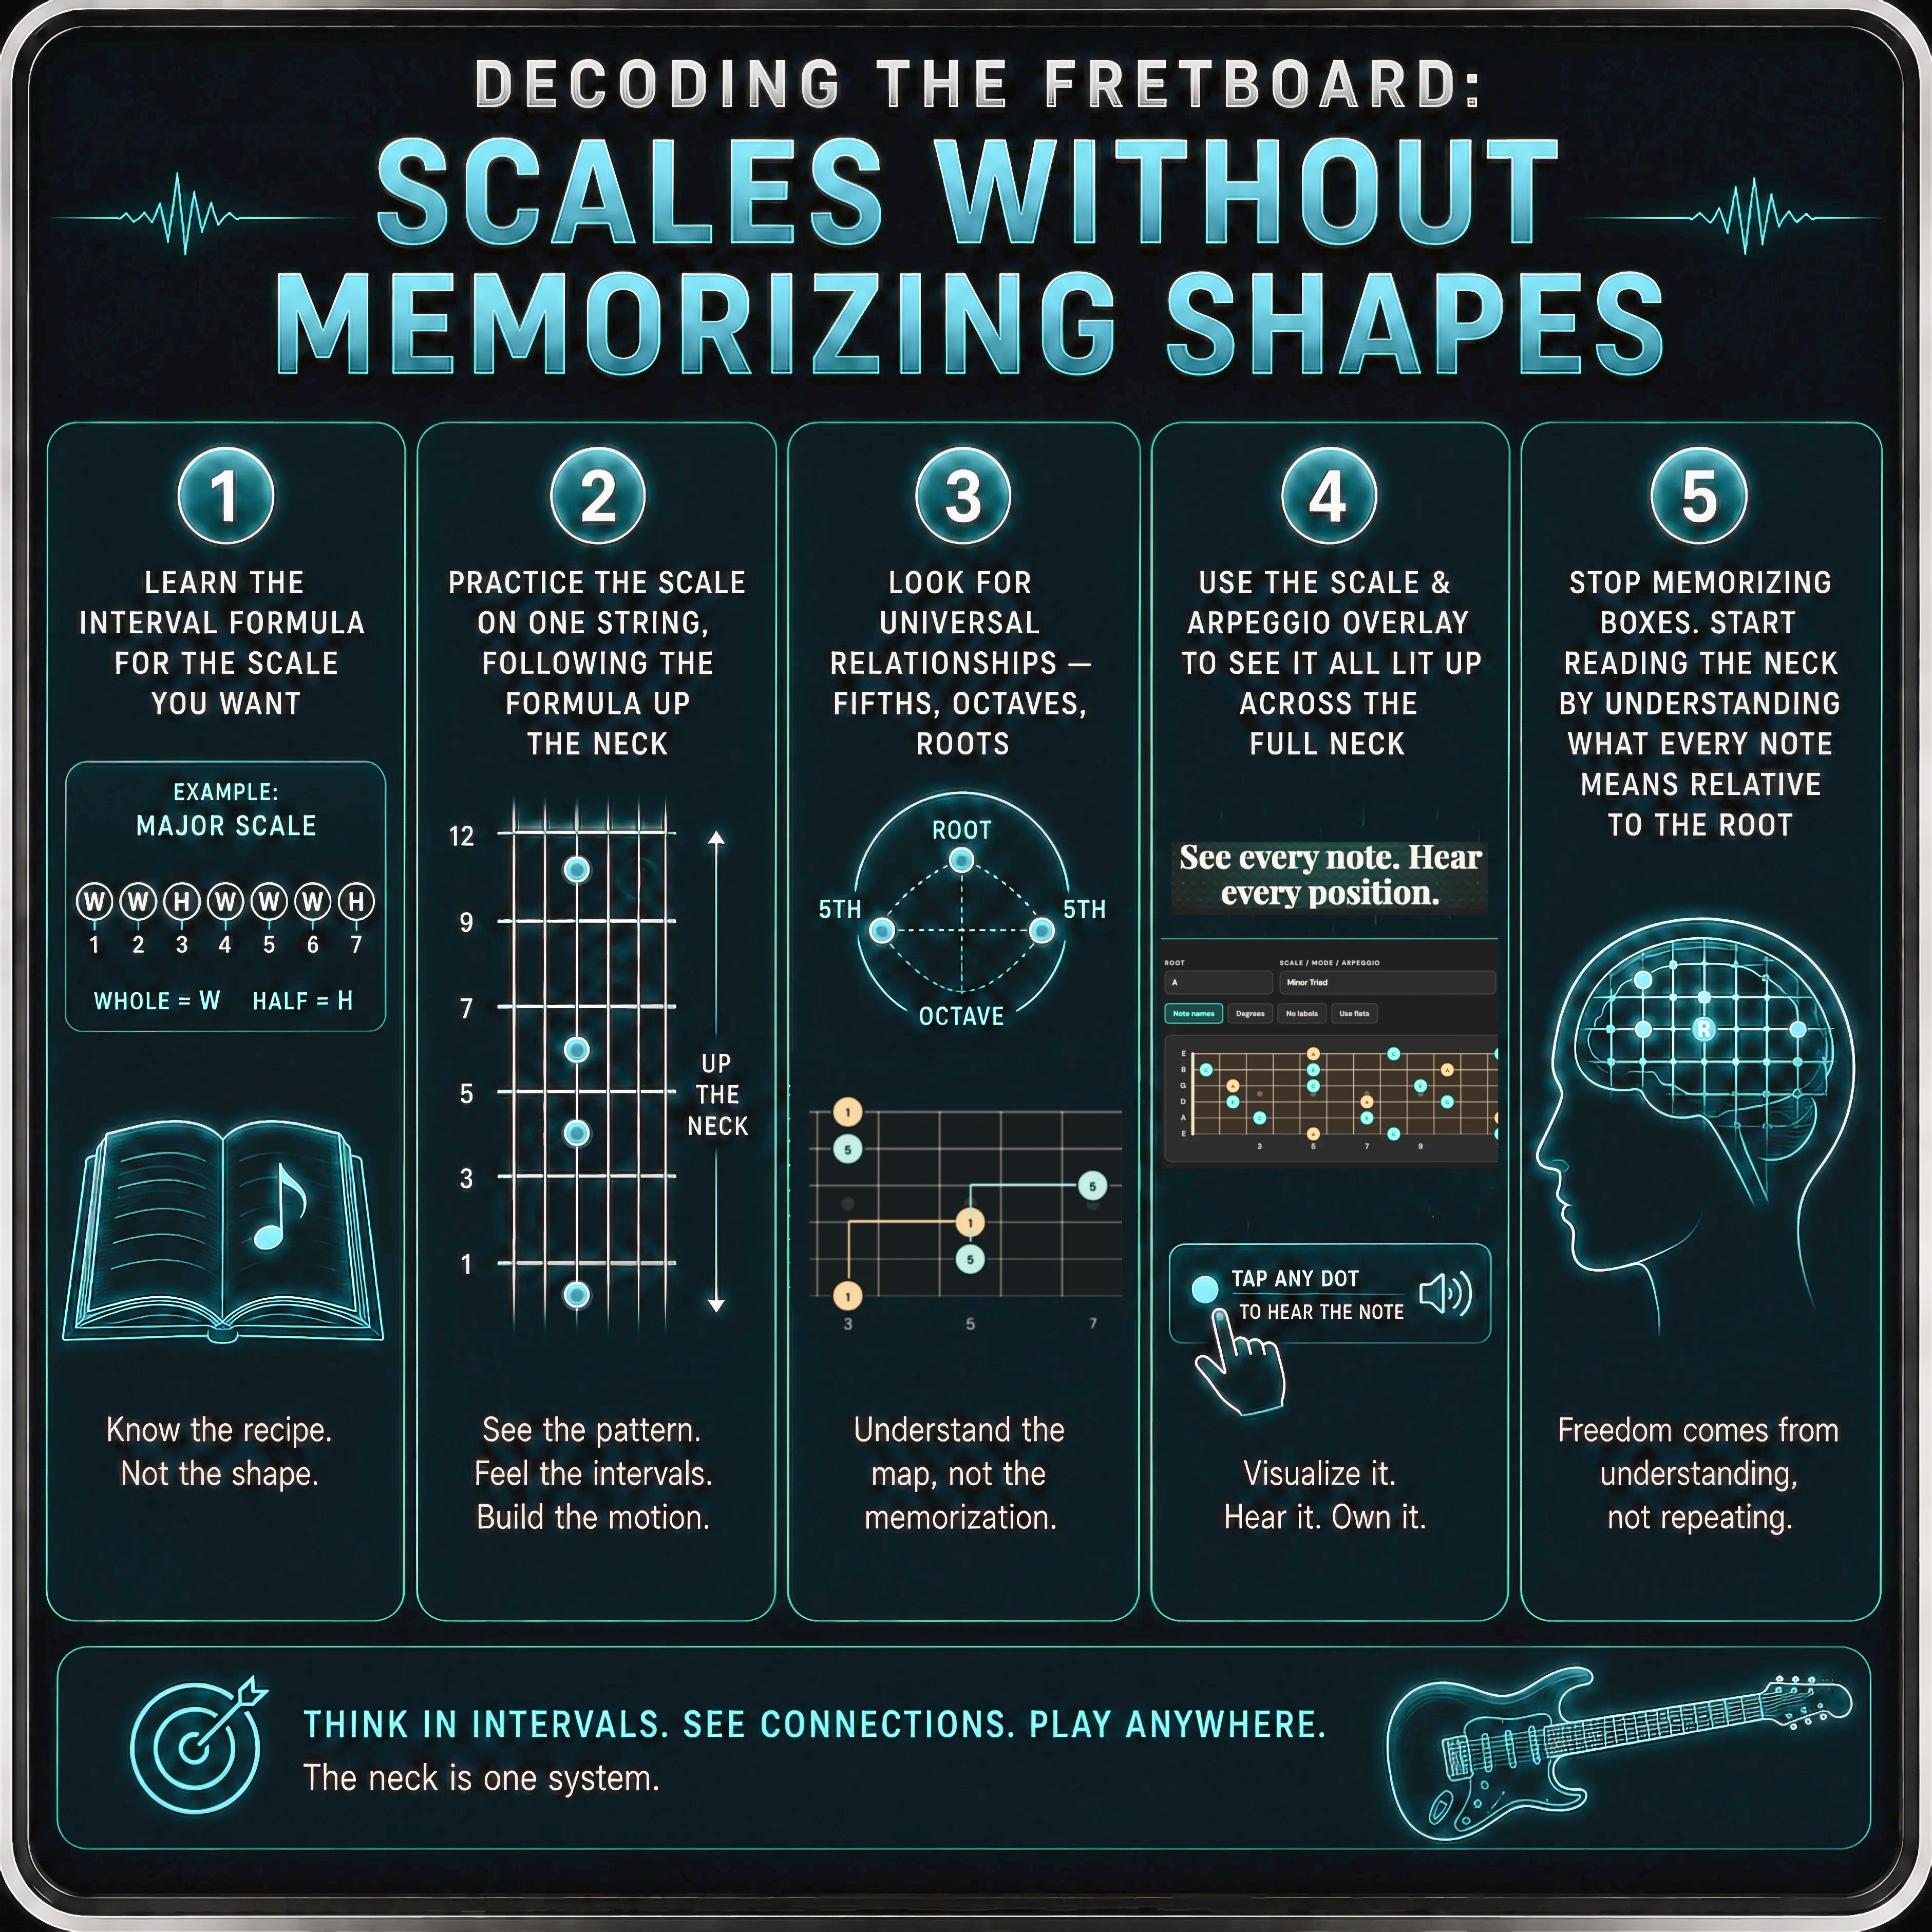
Here is the simplest workflow — start at the top and work your way down:
Learn the interval formula for the scale you want — whole steps and half steps, in order.
Practice the scale on one string, following the formula up the neck without lifting your eye from the intervals.
Look for universal relationships — fifths, octaves, roots — and let your hands start to feel those distances.
Use the Scale & Arpeggio Overlay to see it all lit up across the full neck. Tap any dot to hear the note.
Stop memorizing boxes. Start reading the neck by understanding what every note means relative to the root.
That order keeps the learning calm and practical. The fretboard makes much more sense once you understand the structure underneath it.
Where to go next
If scale shapes have always felt like a trap, the solution is usually to step back and learn the relationships first. Intervals give you a repeatable way to understand every key, every scale, and every arpeggio on the neck — without carrying a diagram in your head.
Want to see the pattern instead of guessing the shape? Open the Scale & Arpeggio Overlay and switch between note names, scale degrees, and arpeggios in real time across 6, 7, or 8 strings.