Setup Guide
Guitar Bridge Intonation Screws: Which Way to Turn Them
Intonation screw directions are confusing because different bridges work differently. Learn the rule, identify your bridge, and adjust with confidence.
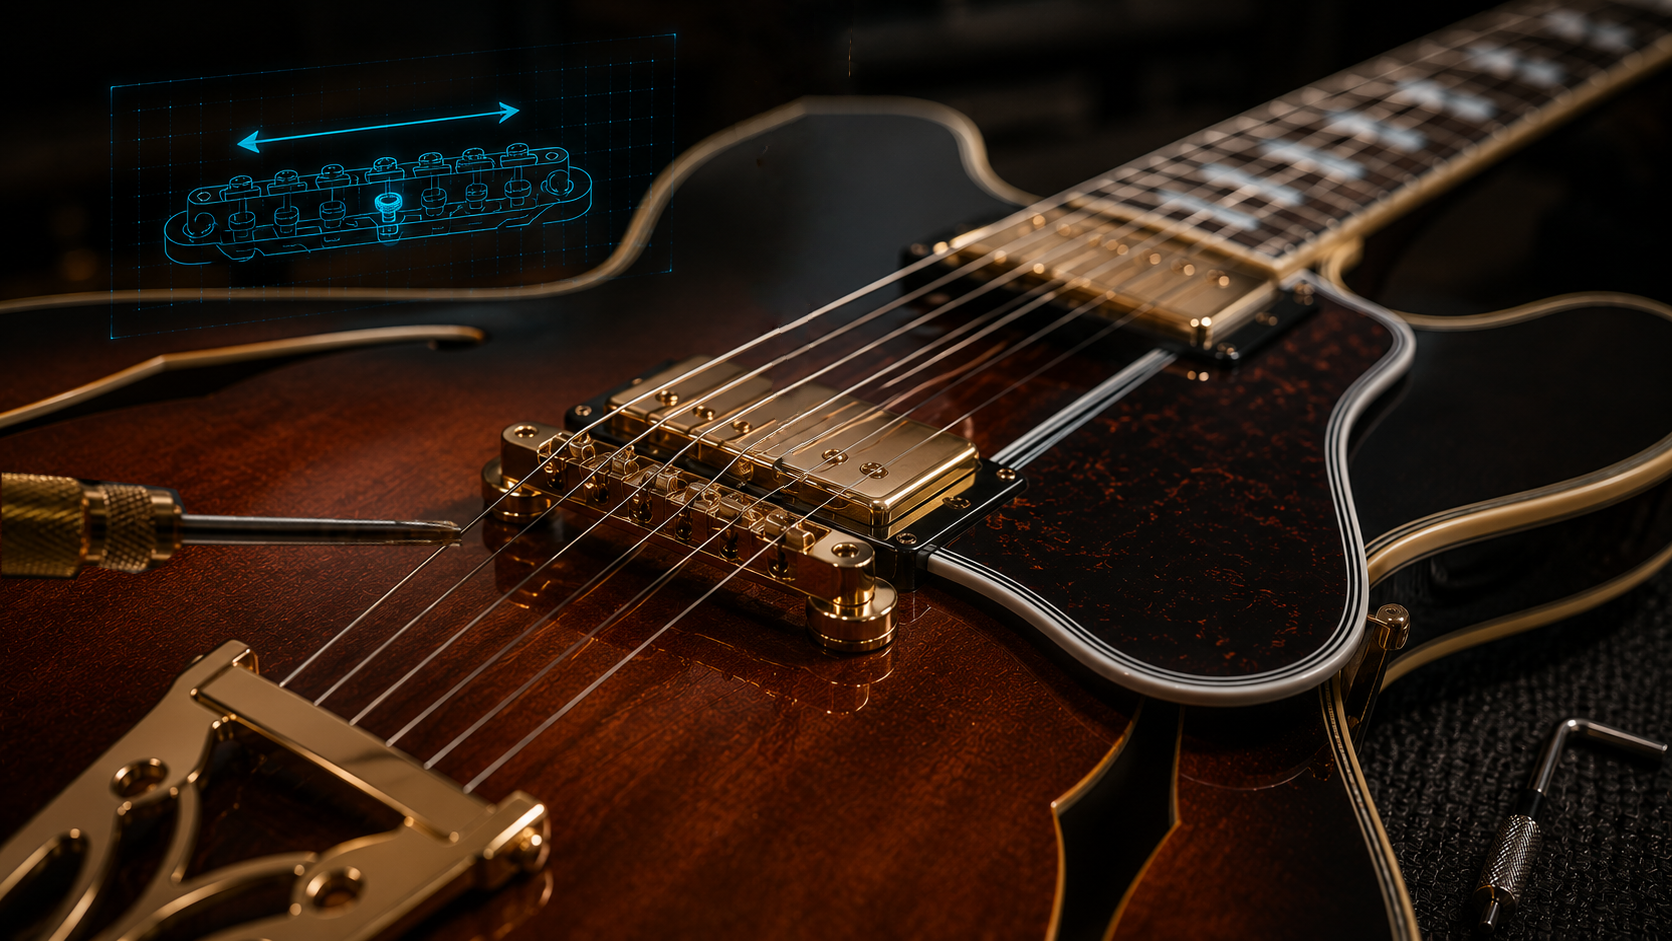
If you have ever searched for the correct way to turn an intonation screw, you have probably seen conflicting advice. One source says clockwise moves the saddle one way, while another says the opposite. That confusion is common because not all bridges are built the same way.
The physics does not change, but the screw orientation does. Once you know which way your bridge is designed, the adjustment becomes much easier to understand. The key is to identify the bridge before turning anything.
The core rule: Flat Forward, Sharp Back
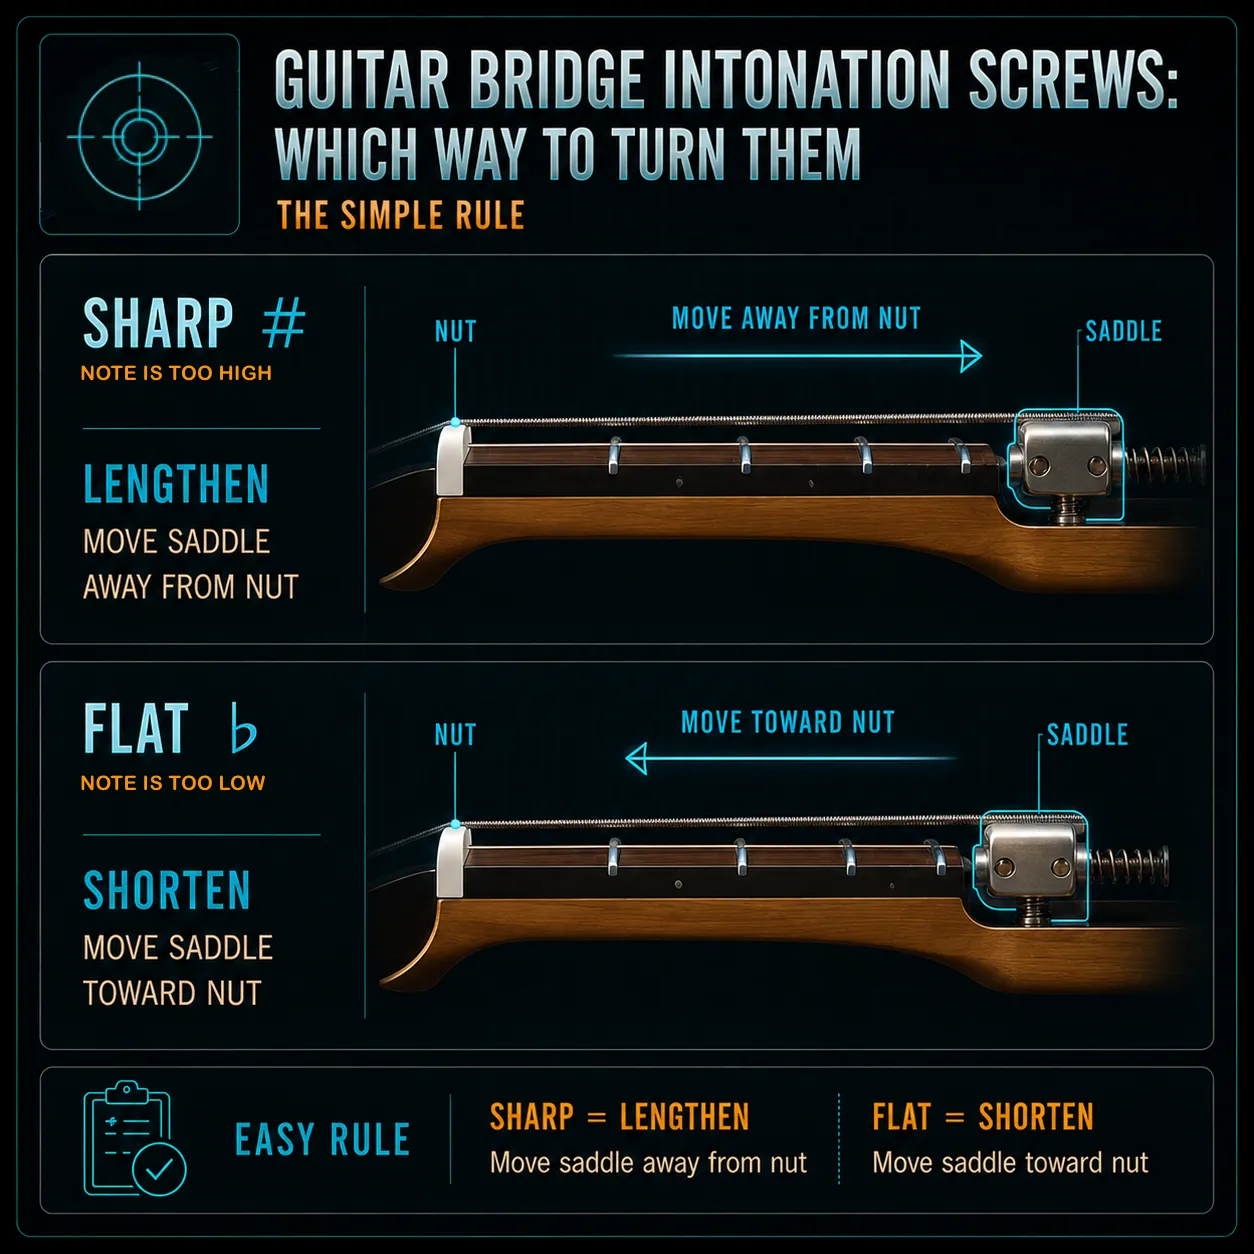
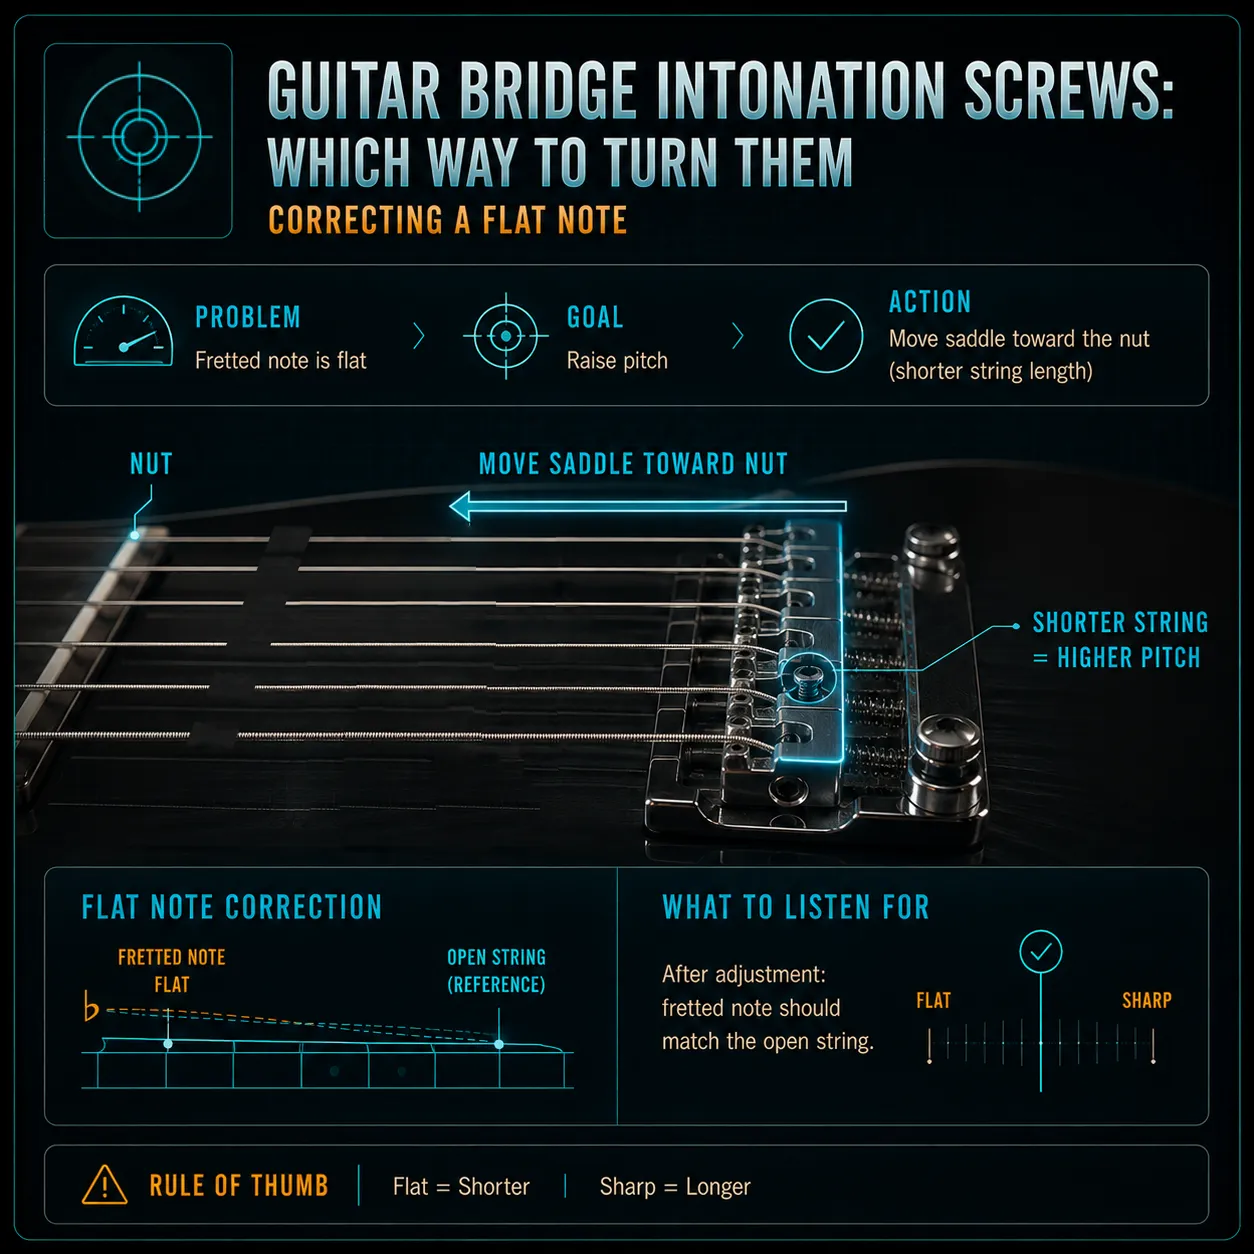
The basic rule is simple: if the note at the 12th fret is sharp, the string length is too short and the saddle needs to move away from the nut. If the note is flat, the string length is too long and the saddle needs to move toward the nut.
An easy way to memorize this on the fly is the classic tech mantra: "Flat Forward, Sharp Back."
That rule is universal. What changes is which way the screw has to turn in order to move the saddle in the right direction. That is why bridge style matters so much.
The right-hand thread rule
Every standard guitar saddle intonation screw uses a standard right-hand thread ("righty-tighty, lefty-loosey").
Crucially, the head of that screw is always trapped against a fixed wall or rim on the bridge assembly (an abutment). Because the screw head cannot move forward or backward through that wall, turning a screw clockwise will always pull the saddle closer to the screw head.
The entire reason guitarists get confused is simply a matter of orientation: Where is the screw head pointing?
If the screw head faces the tail end of the guitar, clockwise and counter-clockwise will behave one way. If the screw head faces the neck or pickups, the direction is reversed in practical terms. That is what creates the conflicting advice players keep running into.
The great bridge divide: Front vs. rear facing
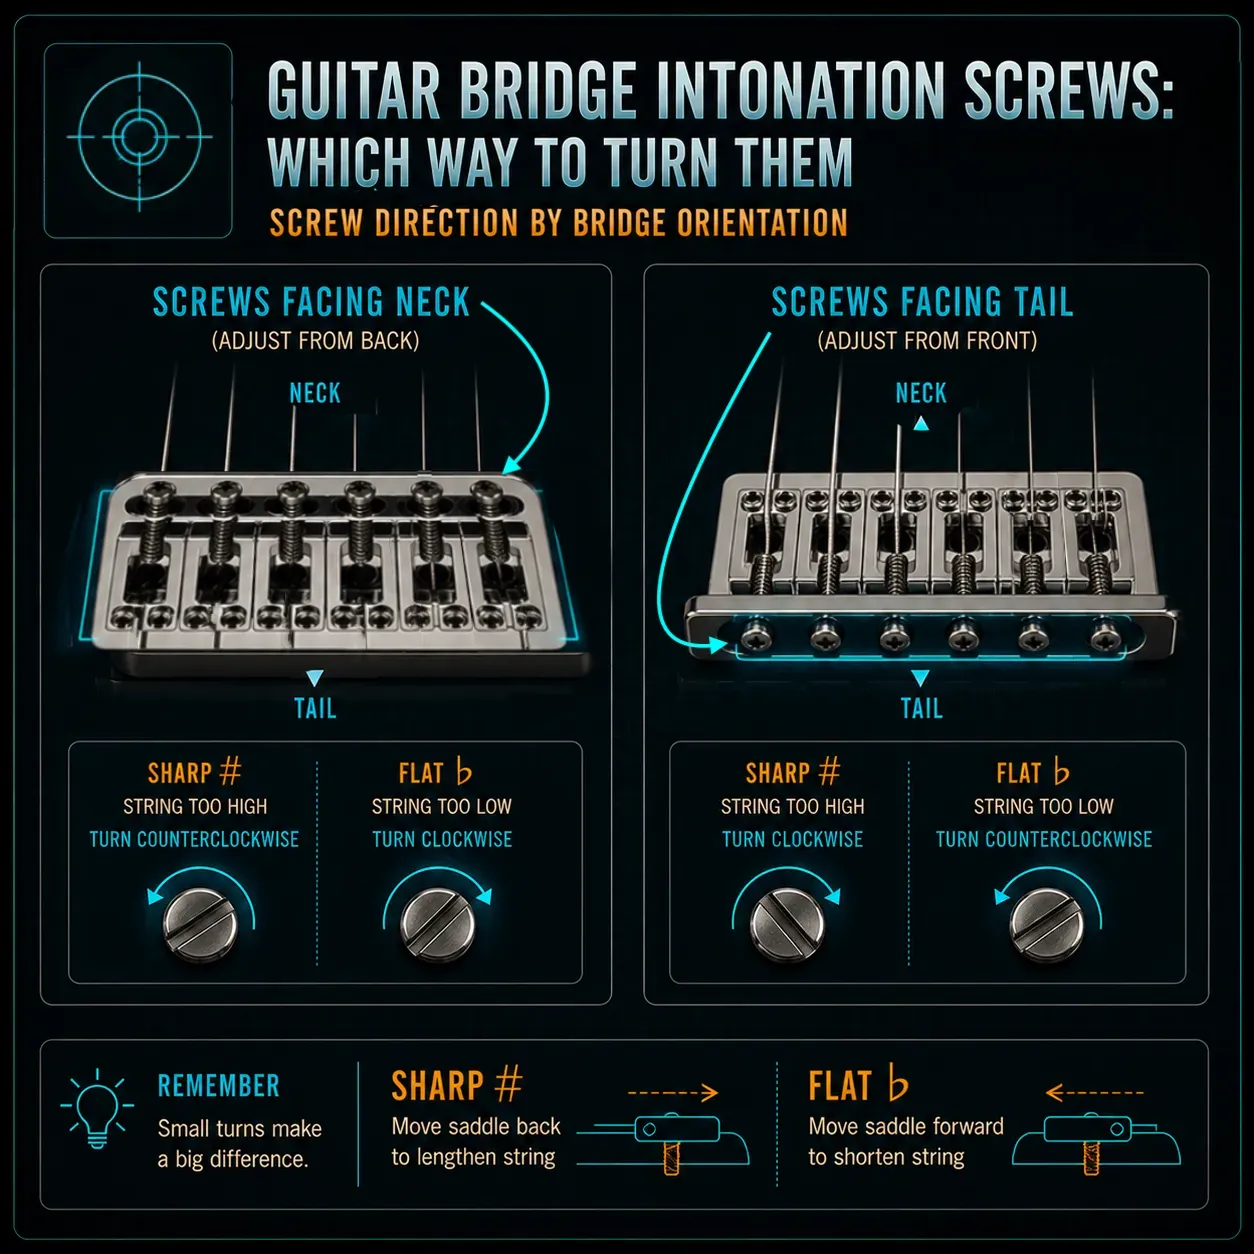
Guitar bridges broadly fall into two camps based on whether the adjustment screws face the neck or face the tail. This is where the conflicting internet advice comes from.
Common Examples: Fender Stratocasters, Telecasters, modern hardtail bridges, and Gibson "Nashville-style" Tune-O-Matic bridges.
To fix a SHARP note (Move Saddle Back): Turn the screw Clockwise. This tightens the screw into the saddle, pulling it toward the screw head (away from the nut).
To fix a FLAT note (Move Saddle Forward): Turn the screw Counter-Clockwise. This backs the screw out, allowing the spring tension or string pressure to push the saddle forward (toward the nut).
Common Examples: Vintage Gibson "ABR-1" Tune-O-Matic bridges, PRS wrap-around bridges, and many vintage hollow-body archtop bridges.
To fix a SHARP note (Move Saddle Back): Turn the screw Counter-Clockwise. Because the screw head is pointing toward the neck, backing the screw out pushes the saddle away from the head (away from the nut).
To fix a FLAT note (Move Saddle Forward): Turn the screw Clockwise. This draws the saddle closer to the screw head (toward the pickups/nut).

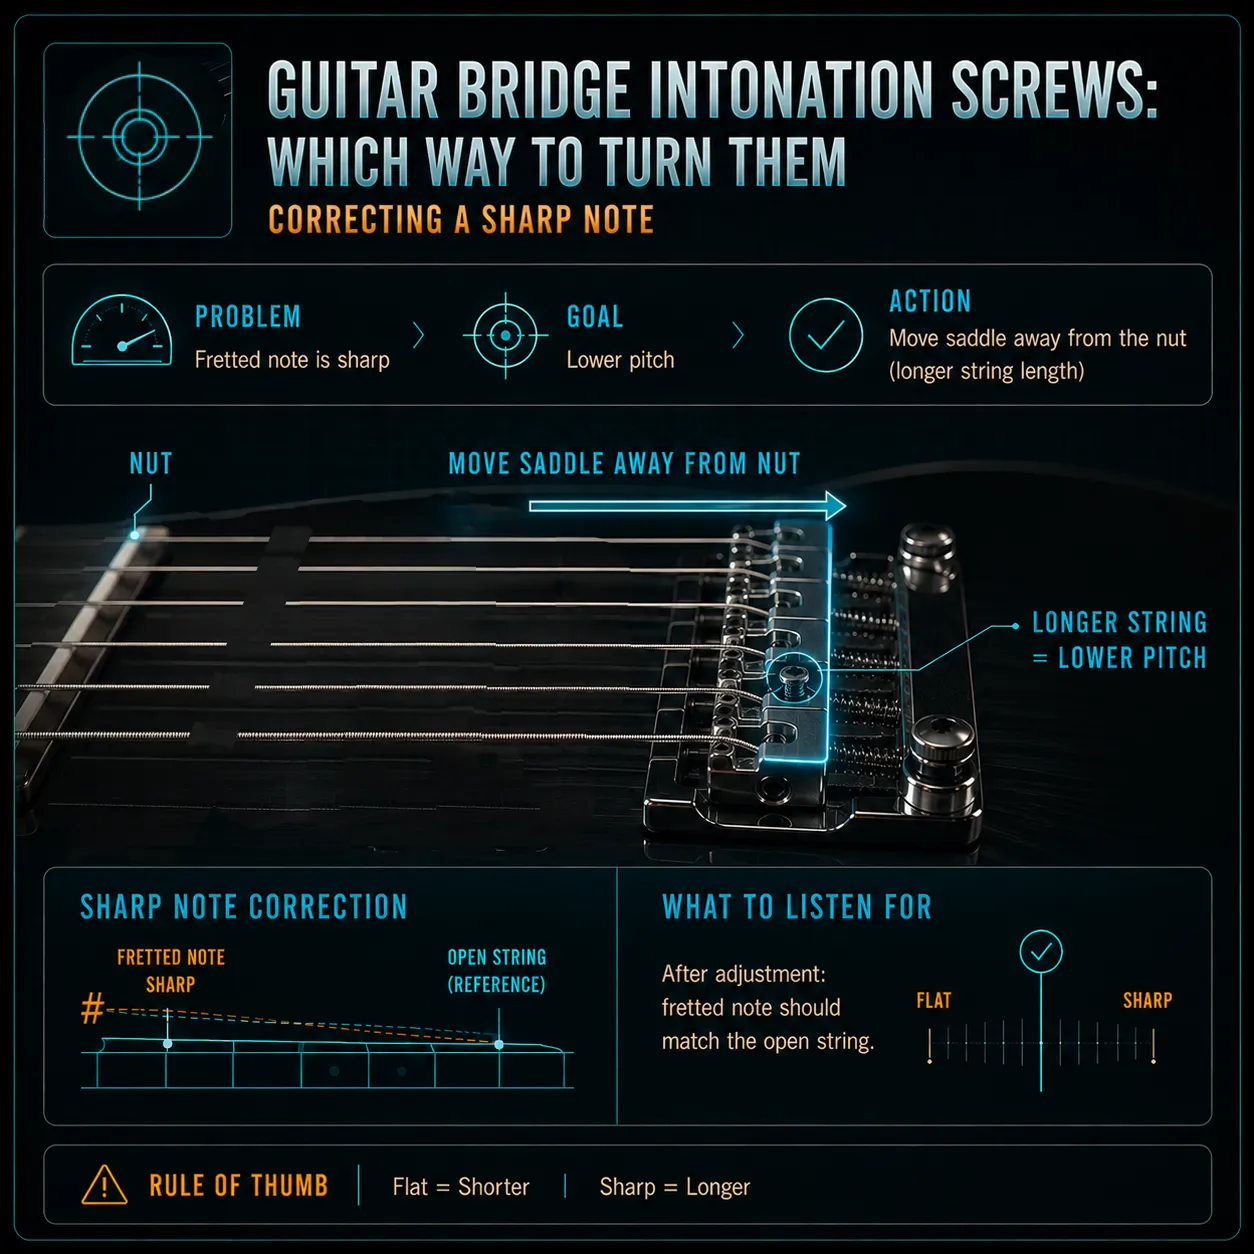
When the note is sharp
If the 12th fret note is sharp, the saddle must move back to lengthen the string. On some bridge designs, that means turning the screw clockwise. On others, it means turning it counter-clockwise.
That is the most important reason to check the bridge before adjusting. The note tells you what direction the saddle needs to move, but the bridge determines how you get there. Keep those two ideas separate and the process becomes much easier.
When the note is flat
If the 12th fret note is flat, the saddle must move forward to shorten the string. Again, the actual screw direction depends on bridge orientation. The note itself does not tell you which way to turn the screw — only where the saddle needs to end up.
That is why intonation is best approached as a small mechanical process rather than a guessing game. Make a change, retune, and test again until the note lines up. Small adjustments are better than large ones.
Quick reference matrix
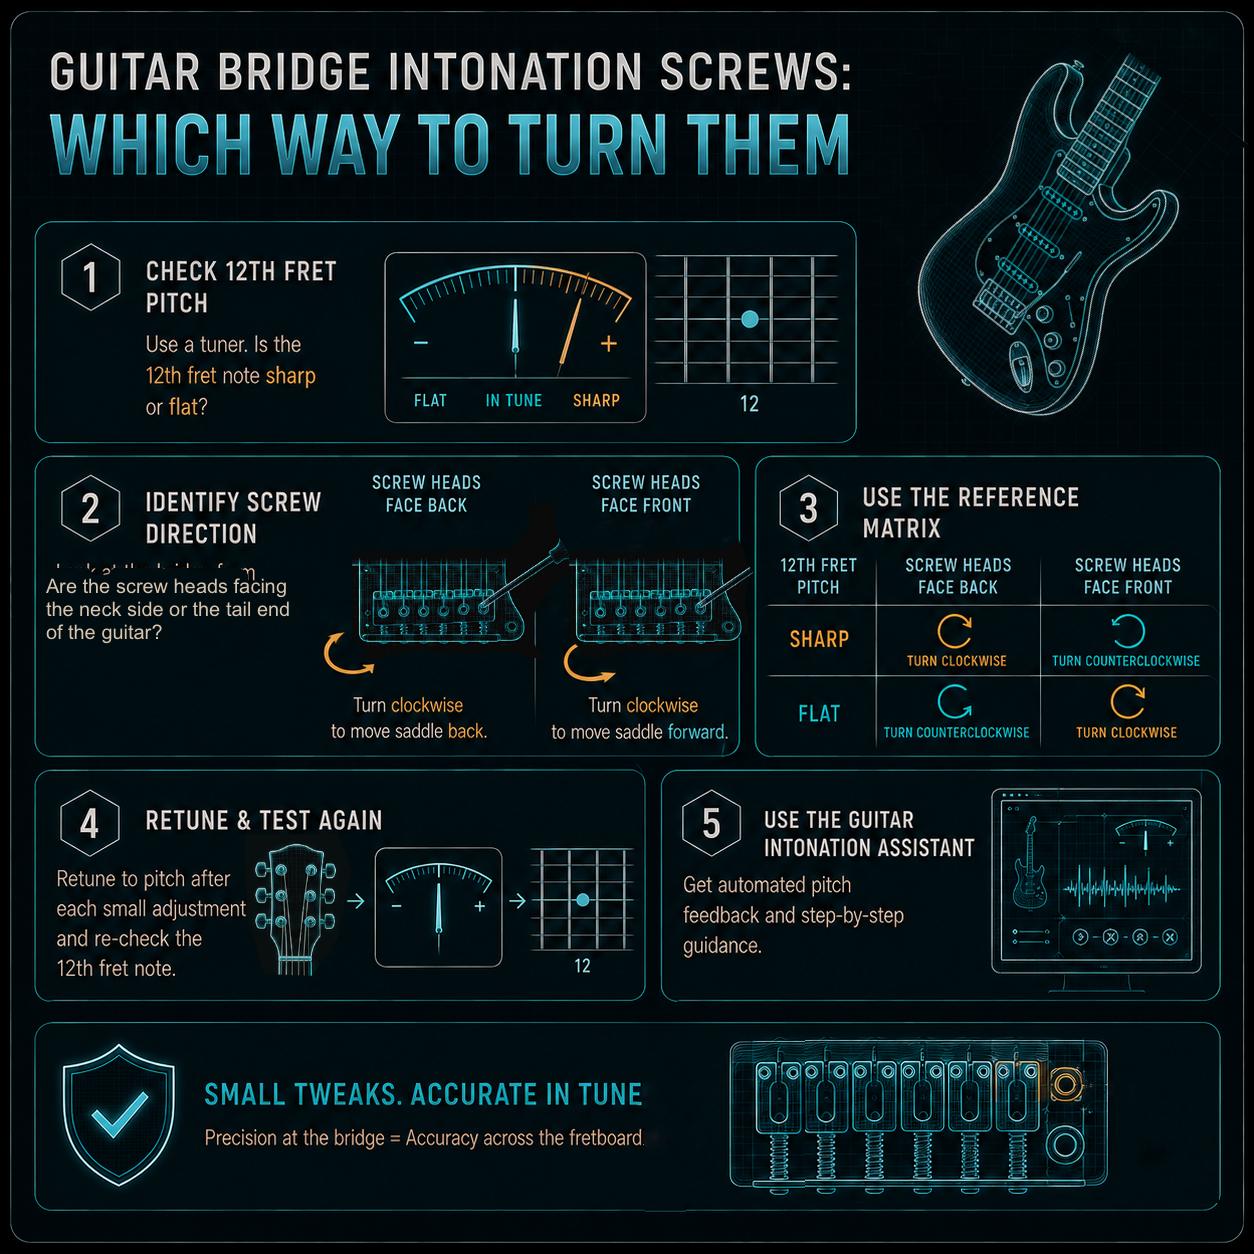
Use this layout to verify exactly what to do based on the hardware sitting under your palm right now:
| Screw Head Position | To Fix a SHARP 12th Fret (Lengthen String) |
To Fix a FLAT 12th Fret (Shorten String) |
|---|---|---|
| Facing the Pickups / Neck | Counter-Clockwise | Clockwise |
| Facing the Tailpiece / Back | Clockwise | Counter-Clockwise |
Don't feel like doing the math?
Dialing in pristine intonation can be a tedious process of micro-adjustments, re-tuning, and keeping track of directional geometry in your head. If your guitar is sounding noticeably out of tune on the higher frets and you want an automated assistant to do the heavy lifting, skip the trial-and-error.
Jump over to our interactive Guitar Intonation Assistant. Our tool will check your pitch readings and tell you exactly which direction to turn your screwdriver—no mental math required.
Open Intonation Assistant →
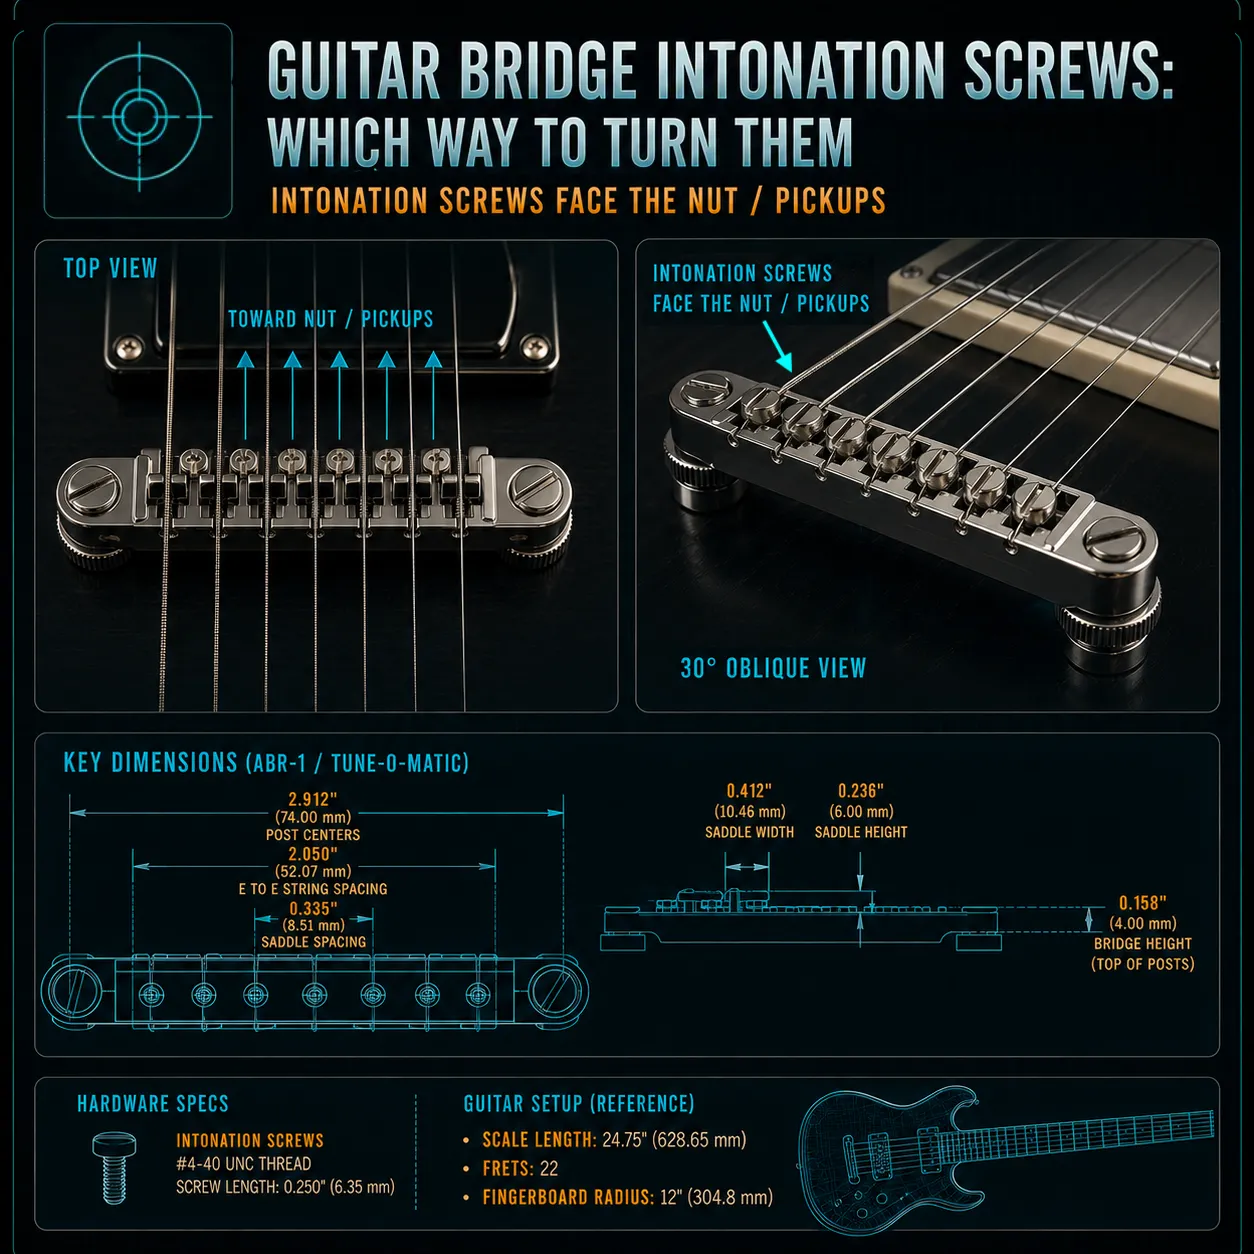
If you play a Gibson-style guitar with a Tune-O-Matic bridge, look closely at your hardware before trusting a factory spec sheet. The standard is to have the screws facing the pickups. Over the decades, millions of players (and even factory workers) have intentionally removed these bridges during string changes and reinstalled them flipped 180 degrees backwards.
Sometimes this was intentional (a tech flips a bridge to give a specific saddle more physical room to travel backward to correct a stubborn string) and sometimes accidental. Because a Tune-O-Matic works perfectly well in either direction, always look at where the screw heads are actually pointing on your specific instrument, rather than assuming based on the guitar model.
The Pocket Roady order
Here is the simplest workflow:
Check whether the 12th fret note is sharp or flat using a tuner.
Identify which way your bridge screw heads actually face.
Turn the screw to move the saddle in the correct direction using the reference matrix.
Retune after every small adjustment and test the 12th fret note again.
Use the Guitar Intonation Assistant if you need help with automated pitch checking.
That sequence keeps the topic calm and practical. Intonation is much easier once you stop relying on generic internet advice and start reading the hardware in front of you.
Where to go next
If your guitar sounds sharp or flat above the 12th fret, intonation is often the first place to look. The right direction to turn the screw depends on the bridge, but the goal is always the same: make the string speak in tune across the neck.
Need precise guidance on which direction to turn your screws? Use the Guitar Intonation Assistant to get step-by-step direction based on your specific pitch readings.