Setup Guide
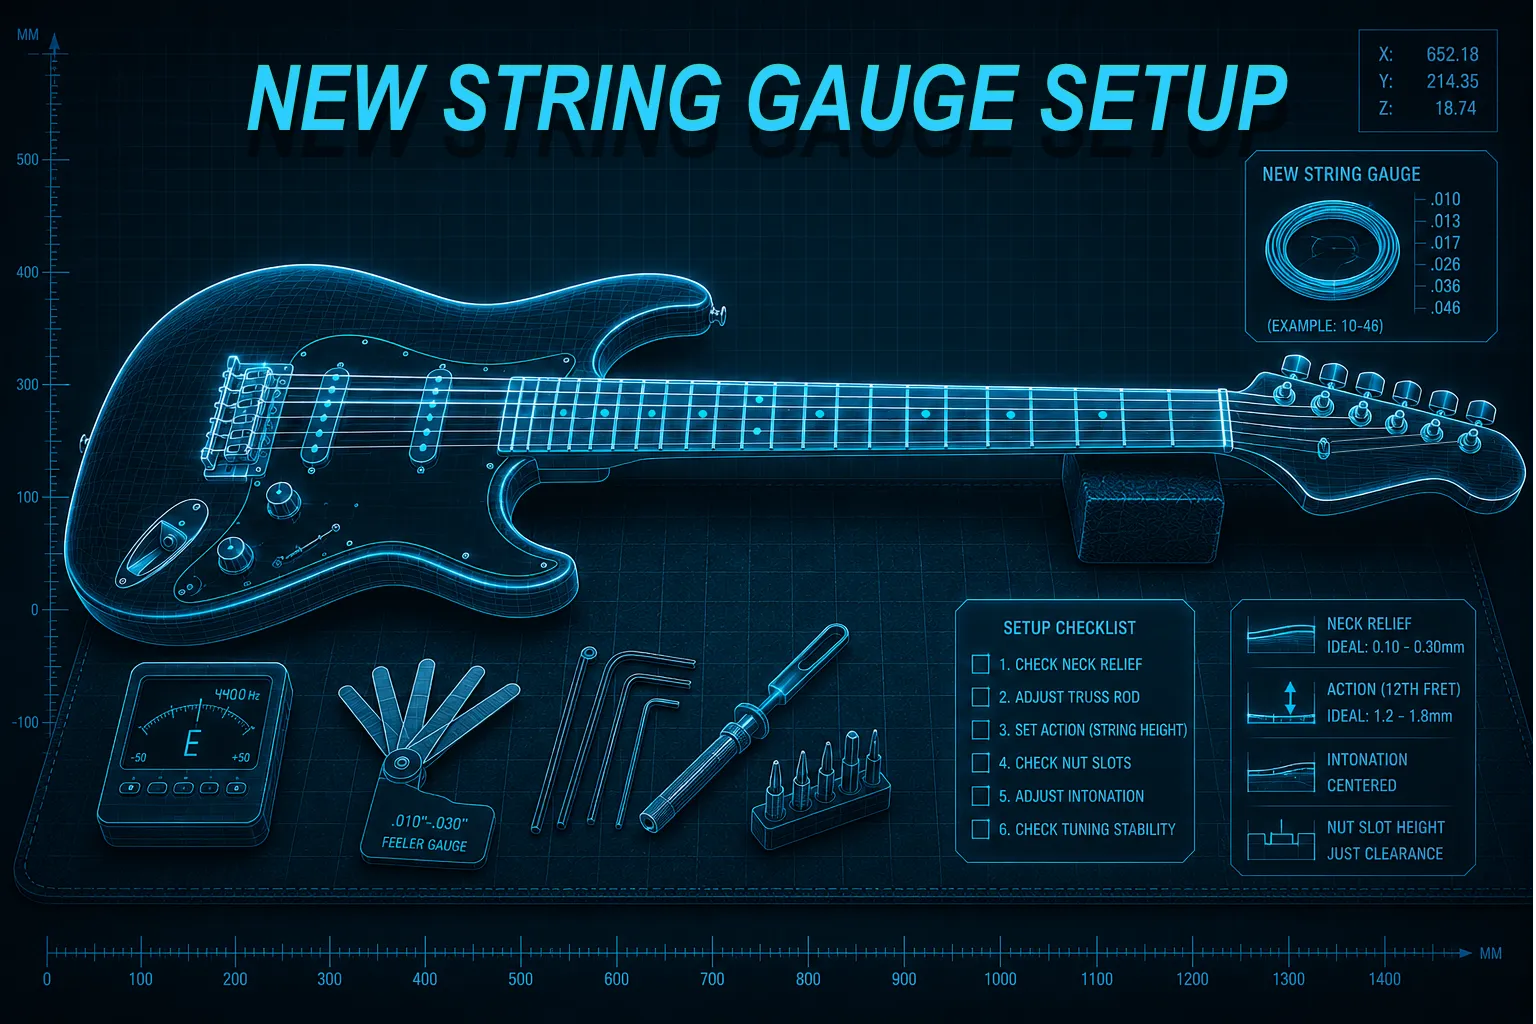
How to Set Up a Guitar After Changing String Gauge
A string gauge change can transform how your guitar feels, but it usually means the setup needs a recalibration too. Here is the right order to bring everything back into balance.
Changing your string gauge is one of the quickest ways to change how a guitar feels under your hands. Heavier strings can add thickness, tension, and stability, while lighter strings can make bends easier and reduce fatigue. But a gauge change almost always affects more than just feel — it can shift the balance of the whole instrument.
That is why setup order matters. Once string tension changes, the neck, nut, action, and intonation may all need a small recalibration. If you follow the right sequence, the guitar usually settles back into a comfortable, predictable setup.
Why Gauge Changes Affect Setup
A guitar is always in a tug-of-war between string tension and neck resistance. When you switch gauges, that balance shifts — and different parts of the guitar respond in different ways.
Strings pull harder. Neck tends to bow forward more. Action may rise. Nut slots may need widening. Saddles likely need adjustment.
Less pull on the neck. Relief may flatten or back-bow. Buzz can appear. Saddle positions need rechecking for the new stretch.
That change in tension is normal, but it is also why the guitar may feel wrong after a restring. You are not fixing a problem so much as restoring the balance your new strings created.
Give the guitar at least 15-20 minutes at pitch before making any adjustments. New strings stretch, and a fresh set of heavier strings in particular can take a little time to stop pulling the neck.
Check the Nut First
If you move to a significantly heavier gauge, the strings may be too wide for the nut slots. That can make the strings sit high or bind in the slots, especially near the first few frets. In that case, the problem starts at the nut before it ever reaches the bridge.
This is why the nut belongs early in the setup sequence. If the string is not sitting cleanly in the slot, everything else downstream becomes harder to judge.

Not sure if the nut is the issue? Start here before anything else.
Start the Setup Assistant →Recheck Neck Relief
Once the new strings are on and tuned to pitch, give the guitar a little time to settle. Then check the neck relief. Heavier strings usually increase forward bow, while lighter strings may leave the neck too flat or even slightly back-bowed.
The goal is not to force the neck straight at all costs, but to bring it back to the amount of relief that lets the strings vibrate cleanly. A minor truss rod adjustment is often all it takes. If the neck feels off after a gauge change, the Setup Assistant can help you map the sequence before you touch the bridge.
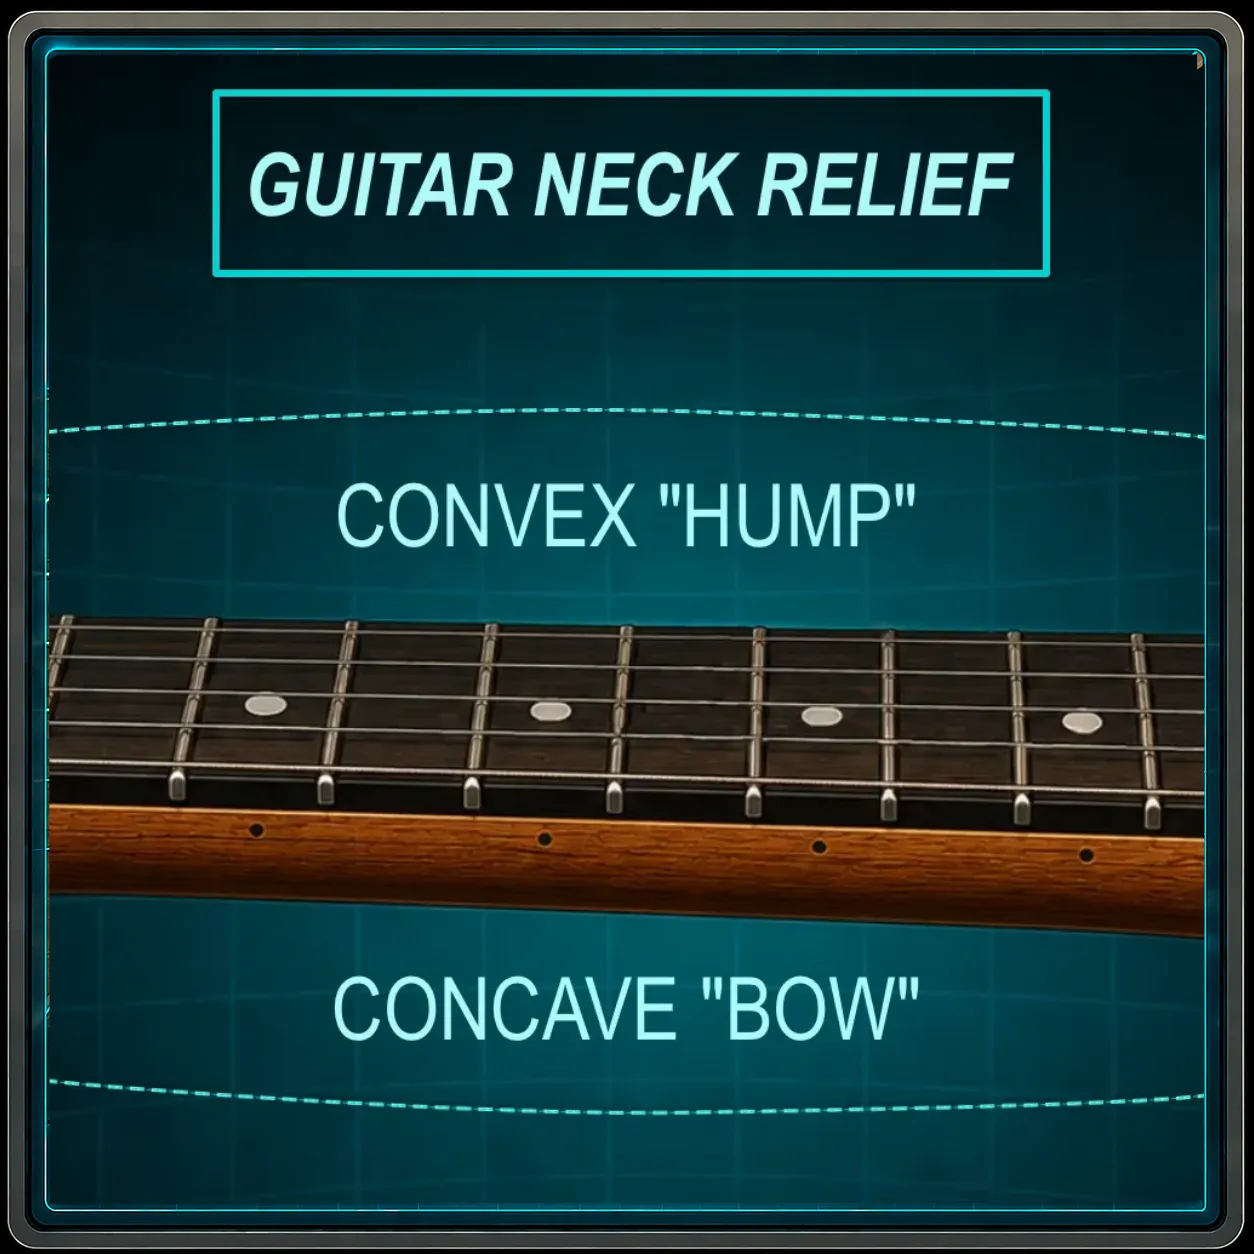
Always check relief before action. If the neck is bowed, lowering the bridge will not fix the playability — it will just move the problem around. Relief comes first in the sequence for a reason.
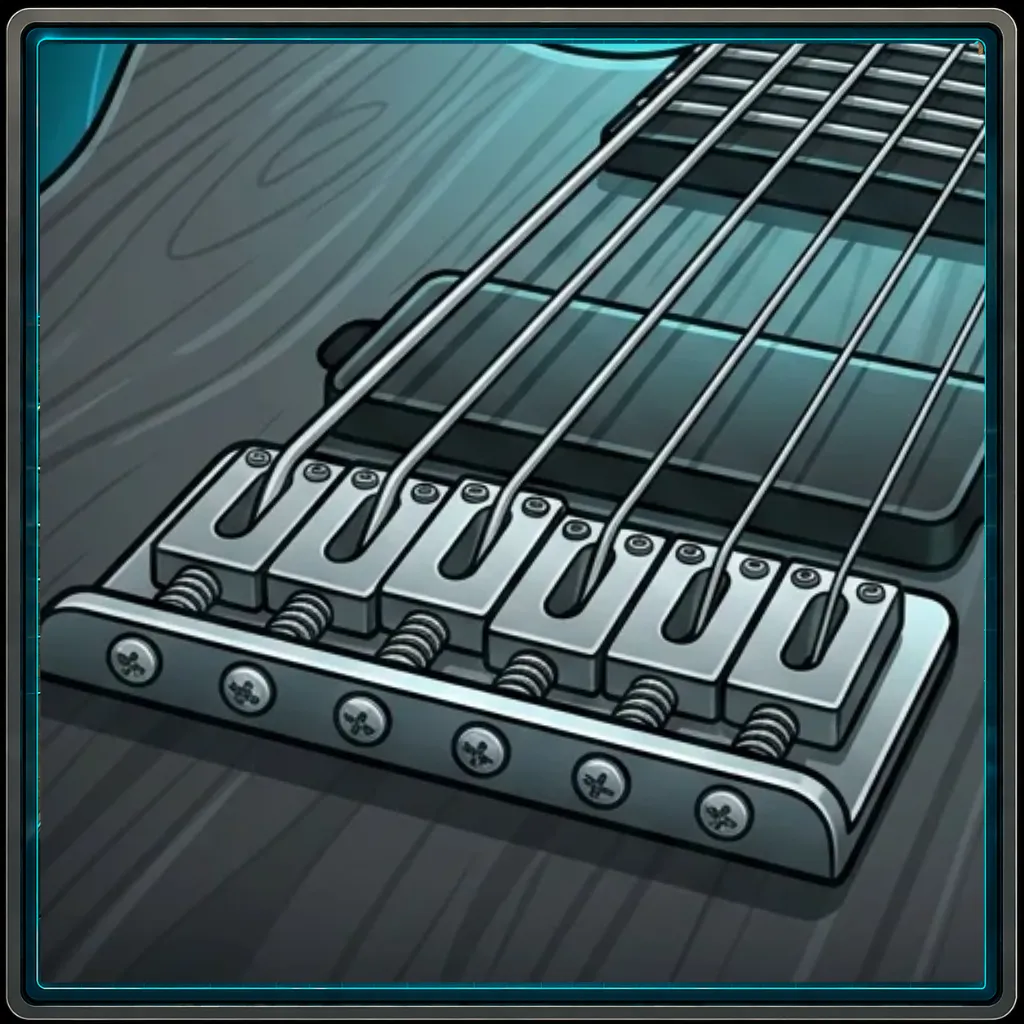
Dial In Action Height
After the neck is stable, check the action at the bridge. Heavier strings can often sit a bit lower because they vibrate in a smaller arc, while lighter strings may need a little more room to move without buzzing. A gauge change can subtly alter how low or high the bridge should sit.
Action should always be checked after relief, not before it. Once the neck is sorted, a small bridge adjustment usually feels much more predictable and lands closer to the target on the first try.
Recheck Intonation
The last step is intonation. Different string gauges stretch differently when fretted, which means your old saddle positions may no longer be correct. If you skip this step, the guitar may sound fine open but drift sharp or flat higher up the neck.
This is where the Intonator becomes the most useful final check. After the new gauge is installed and the guitar is otherwise balanced, intonation is the last thing you lock in.
Ready to lock in the saddle positions? The Intonator is the last step in the chain.
Open the Intonator →The Pocket Roady Order
The safest setup sequence after a gauge change keeps you from chasing symptoms out of order and makes each step feel predictable.
Check whether the new strings fit the nut slots cleanly — no binding, no sitting too high.
String up, tune to pitch, and let the guitar settle for 15-20 minutes.
Adjust neck relief if needed — always before touching the bridge.
Set the action height at the bridge once the neck is stable.
Recheck intonation — different gauges stretch differently and saddle positions may have shifted.
Make only small changes at a time and retune between each one.
That order keeps the workbench calm and prevents you from correcting the wrong thing first.
Where to Go Next
If you are changing gauge and want to do it right, start with the Guitar Setup Assistant so you can follow the setup in order. Once the bridge height and relief are stable, use the Intonator to lock in pitch across the fretboard. And if you are planning a future gauge swap, keep an eye on the upcoming String Tension Calculator — it will help you estimate the pull before you even string up.
A gauge change is not something to fear. It is just the point where a guitar's setup needs to catch up with the new tension, and the right sequence makes that process much easier.
Changed gauges and not sure where to start? Use the Guitar Setup Assistant to walk through the full order, check the Intonator once the bridge height is set, and keep an eye on the upcoming String Tension Calculator if you want to plan the pull before you string up.