The 4 Steps to a Better Guitar Setup
A good setup is not about chasing one magic adjustment. It is about checking the guitar in the right order so you do not waste time fixing the wrong thing first.
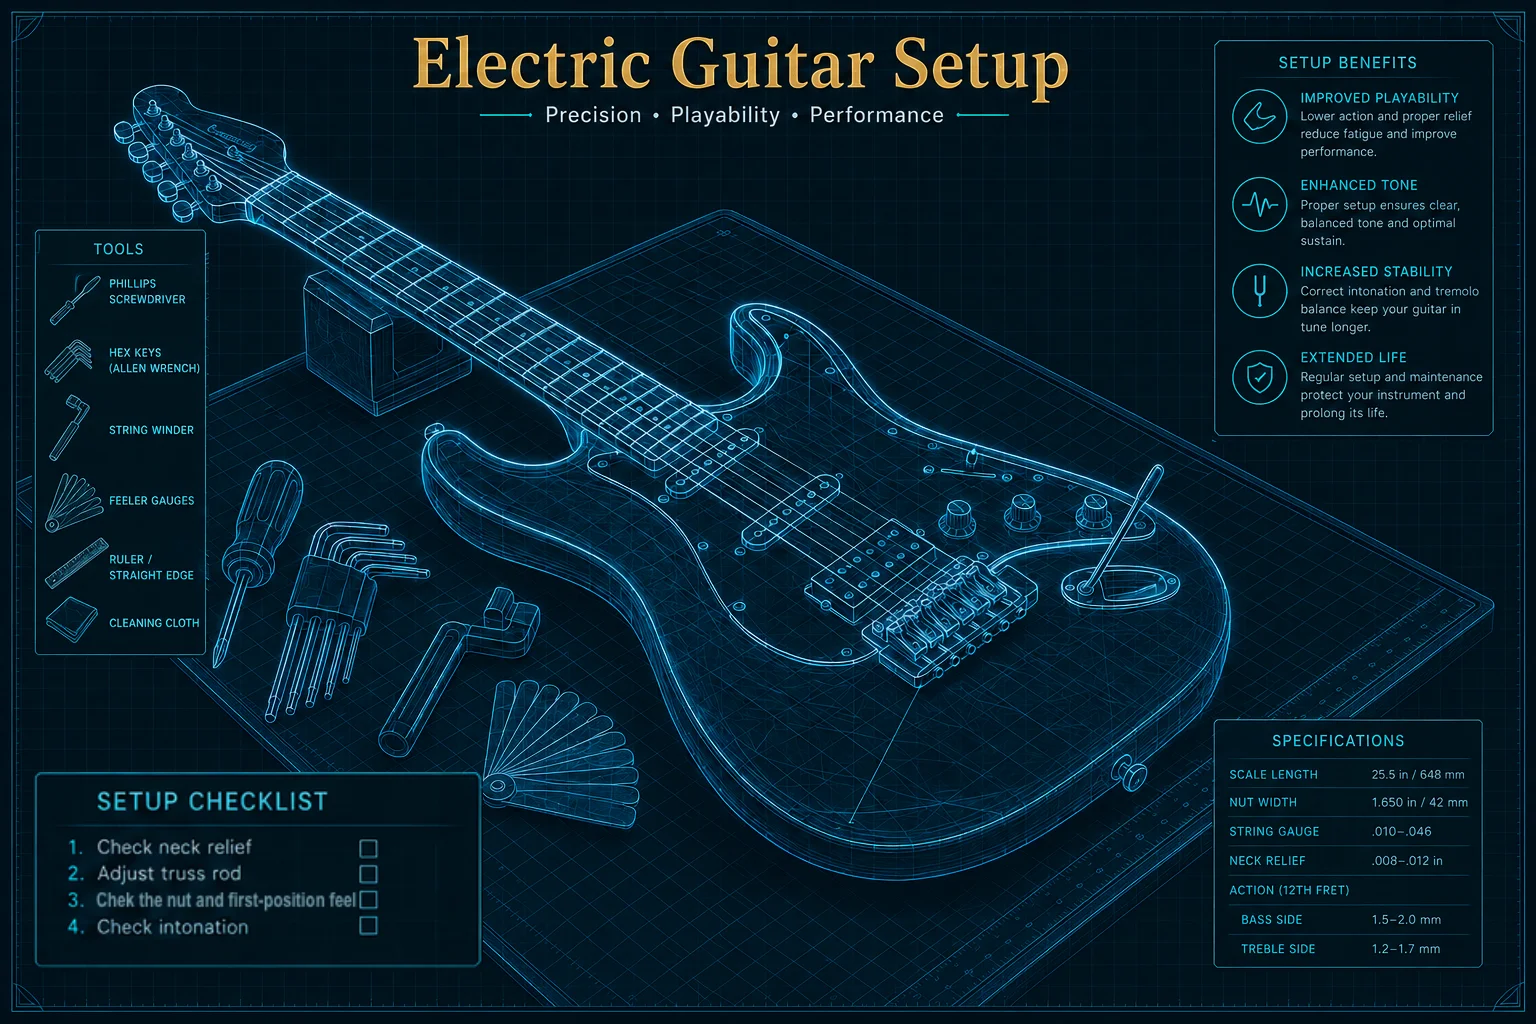
If your guitar feels off, sounds buzzy, or just does not play the way it should, start with the basics. The most useful setup order is simple: neck relief, nut, action, and intonation. Get those four things lined up, and the guitar usually starts making a lot more sense.
The Setup Order
Check the Neck Relief First

Neck relief is measured with the string fretted at the first and last fret simultaneously.
Start with the neck, because it affects how the strings behave across the entire fretboard.
If the neck is too straight, the strings may buzz in places they should not. If it has too much bow, the guitar can feel harder to play and less responsive. You are not trying to make the neck perfect for some abstract reason — you are just trying to get it into a shape that lets the strings vibrate cleanly.
This is the first place to look because neck issues can make almost everything else look wrong. A guitar can seem like it needs a dozen fixes when the real problem is just the neck.
Check the Nut and First-Position Feel

Nut slot height has the biggest impact on how the guitar feels in the first few positions.
Once the neck is in a reasonable range, look at the nut and how the guitar feels in the first few frets.
Open strings and first-position notes should feel easy and behave normally. If the nut slots are too high, the guitar can feel stiff near the headstock. If they are too low, open-string buzz can show up and make the whole instrument feel off.
Why the nut belongs early
A guitar can feel fine higher up the neck while still being frustrating at the first fret. That is why the nut belongs early in the process, not at the end. Skipping it and going straight to action makes the action harder to read correctly.
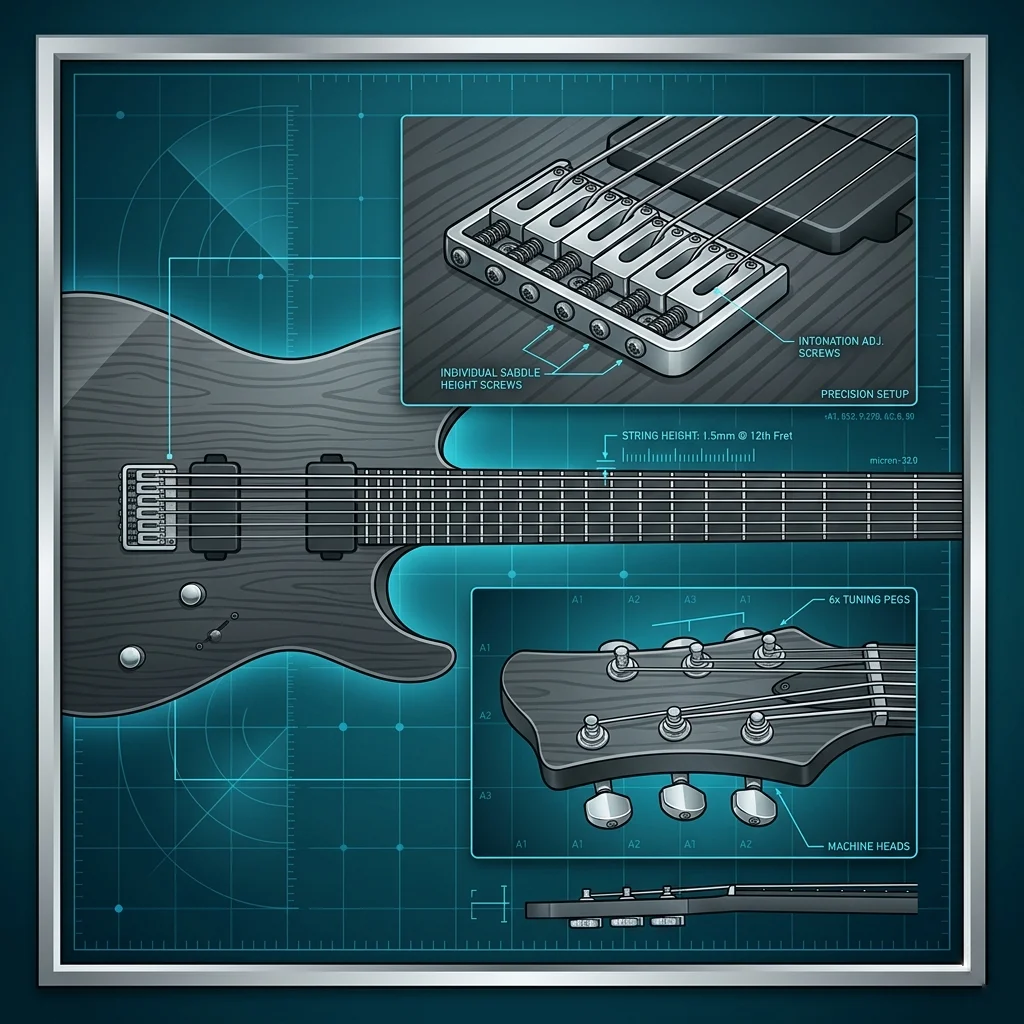
Set the Action

Action is typically measured at the 12th fret, but the whole fretboard matters.
After the neck and nut are sorted, adjust the action.
Action is the string height over the frets, and it has a big impact on comfort, buzz, and playing feel. Too high, and the guitar can feel like work. Too low, and the strings may buzz or feel weak.
This is where the setup starts to feel more personal. You are not just correcting a problem anymore — you are shaping how the guitar reacts in your hands. There is no single right answer for action; it depends on how you play.
Finish with Intonation
Intonation is set by comparing the open string pitch to the fretted 12th fret note.
Once everything else is stable, set the intonation.
Intonation makes sure notes stay in tune as you move up the neck. It is the final step because it depends on the earlier adjustments being close to right. If the neck, nut, or action are off, intonation can look worse than it really is.
Why intonation comes last
A lot of players want to start here because it sounds precise, but intonation is really the finishing move, not the starting point. Settle the other three steps first — then intonation usually goes quickly.
Why the Order Matters
A guitar setup is a chain, not a single adjustment. If one part is wrong, it can make another part look like the problem.
That is why a simple order works best: start with the neck, check the nut, set the action, finish with intonation. When you follow that order, you spend less time guessing and more time actually improving the guitar. That is the whole point.
The Chain Rule
Each step in the setup relies on the one before it being in a reasonable place. Jumping ahead — like setting intonation before the neck is stable — means you may have to redo it later. Follow the chain and you'll spend less time going in circles.
A Pocket Roady Way to Think About It
The best setup advice is usually not the most complicated advice. It is the advice that helps you check the right thing first.
So when a guitar starts acting up, keep it simple:
- Start with the basics.
- Don't blame intonation too early.
- Fix the foundation before the fine-tuning.
- Let the setup tell you what it needs.
That approach is calmer, faster, and a lot more useful than randomly turning screws and hoping the guitar forgives you.
Closing Thought
If the guitar feels wrong, do not treat every symptom like a separate mystery. Most of the time, the answer is already in the setup order.
Get the neck right. Check the nut. Set the action. Finish with intonation. That is the cleanest path to a guitar that feels easier to play and makes more sense from top to bottom.
Work through the setup step by step
Use the Pocket Roady Guitar Setup Assistant — a simple interactive tool that walks you through each step in sequence, with notes you can follow along with.
Open the Guitar Setup Assistant →