How to Change Strings Without Losing Your Setup
Changing strings can throw off a good setup if you do it the wrong way. Here is the safest restringing method, and when setup checks matter.

It is frustrating when a guitar is playing perfectly, then suddenly feels different after a string change. The action might seem higher, the neck may feel looser, or the setup can start to behave differently than it did before. That usually happens because string tension changed too fast.
A guitar setup is a balance between string pull and neck resistance. If that balance is removed all at once, the instrument can shift temporarily and sometimes longer than expected. The safest approach is to keep the tension as stable as possible while you work.
Change strings one at a time
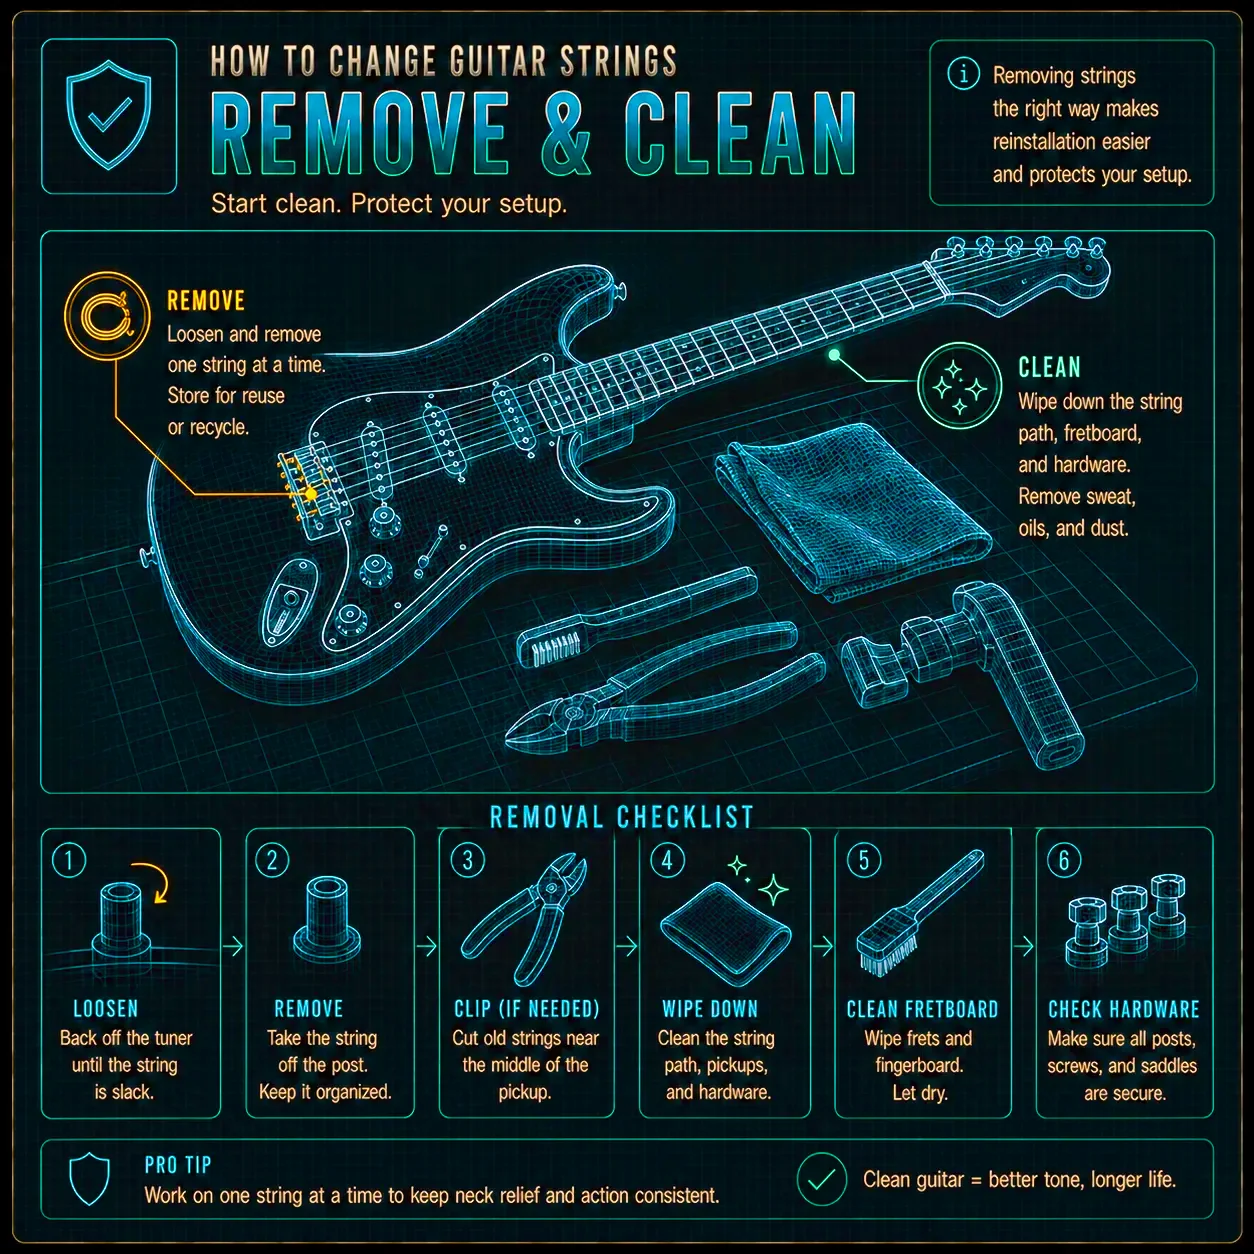
The easiest way to protect your setup is to replace strings one at a time. That keeps tension on the neck more consistent while you work. It also helps the bridge, neck, and hardware stay in a more stable position.
If you remove all the strings at once, the guitar can relax and shift. That may be harmless in some cases, but it can also make re-tuning and setup recovery more complicated. One string at a time is usually the safest default.
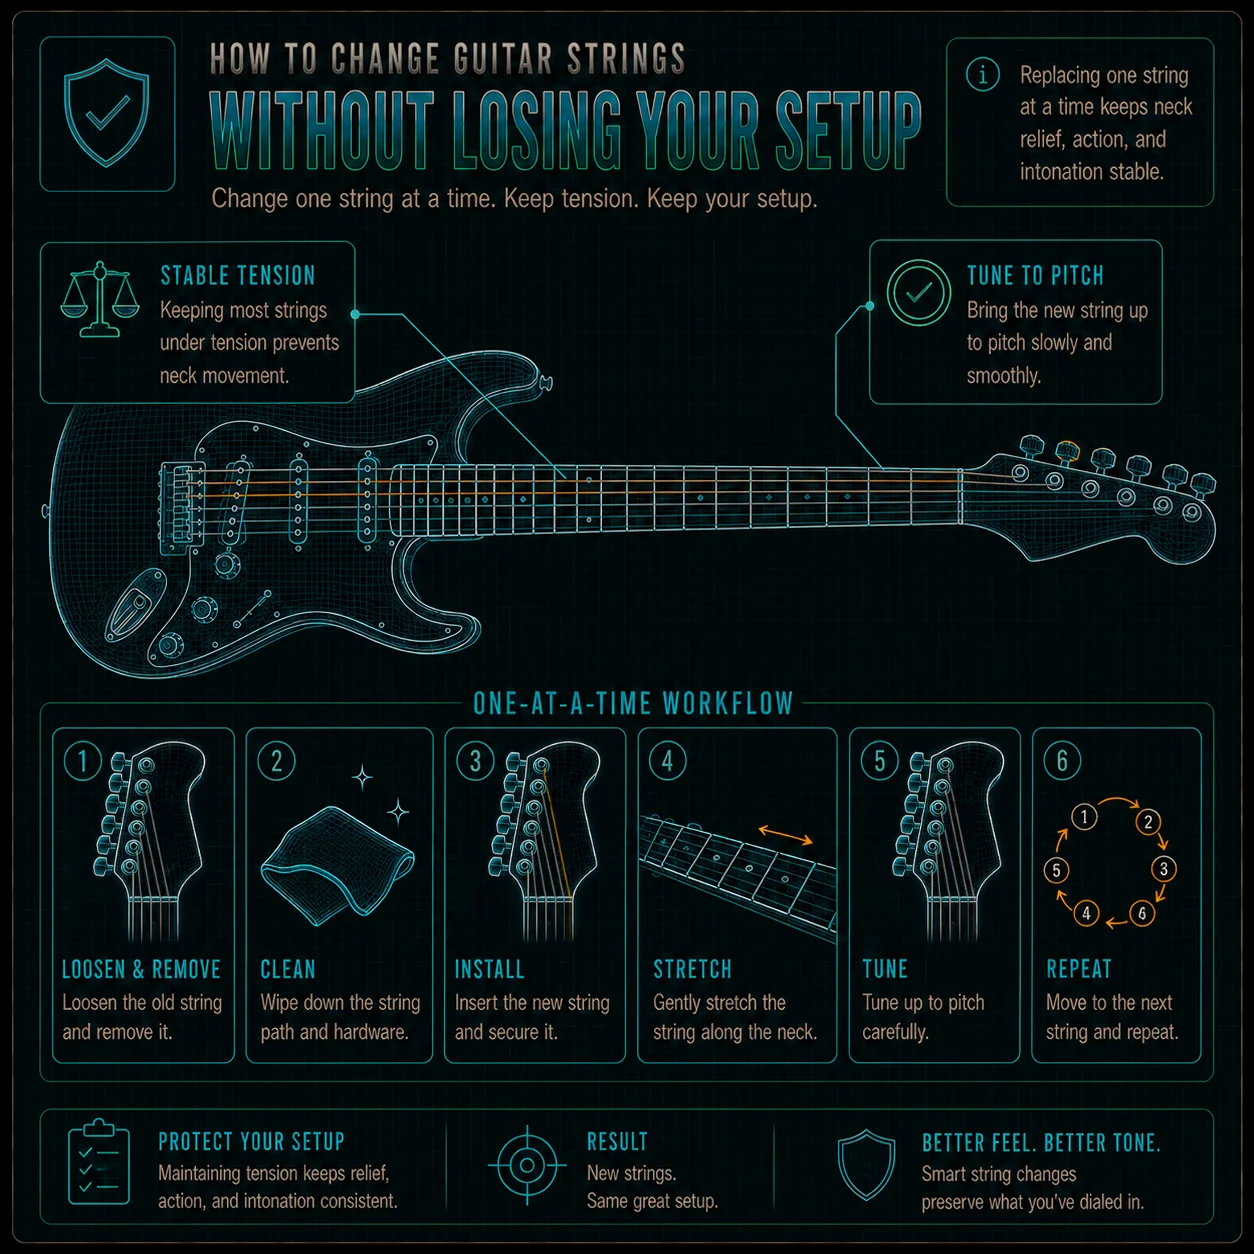
One string at a time keeps the neck calm. Swapping strings individually holds steady tension on the neck, so the bridge and relief barely move. It's the simplest way to come out the other side of a restring with the same setup you started with.
Know when full removal is okay
Sometimes you do need to remove all the strings at once, especially if you are cleaning the fretboard deeply or making bigger maintenance changes. In those cases, it helps to be careful about the order of operations. A little planning avoids unnecessary strain on the instrument.
If you are changing gauges, that matters too. A heavier or lighter set changes tension enough that the guitar may need adjustment afterward. That is why string changes and setup checks often go hand in hand.
Use the right restringing gear
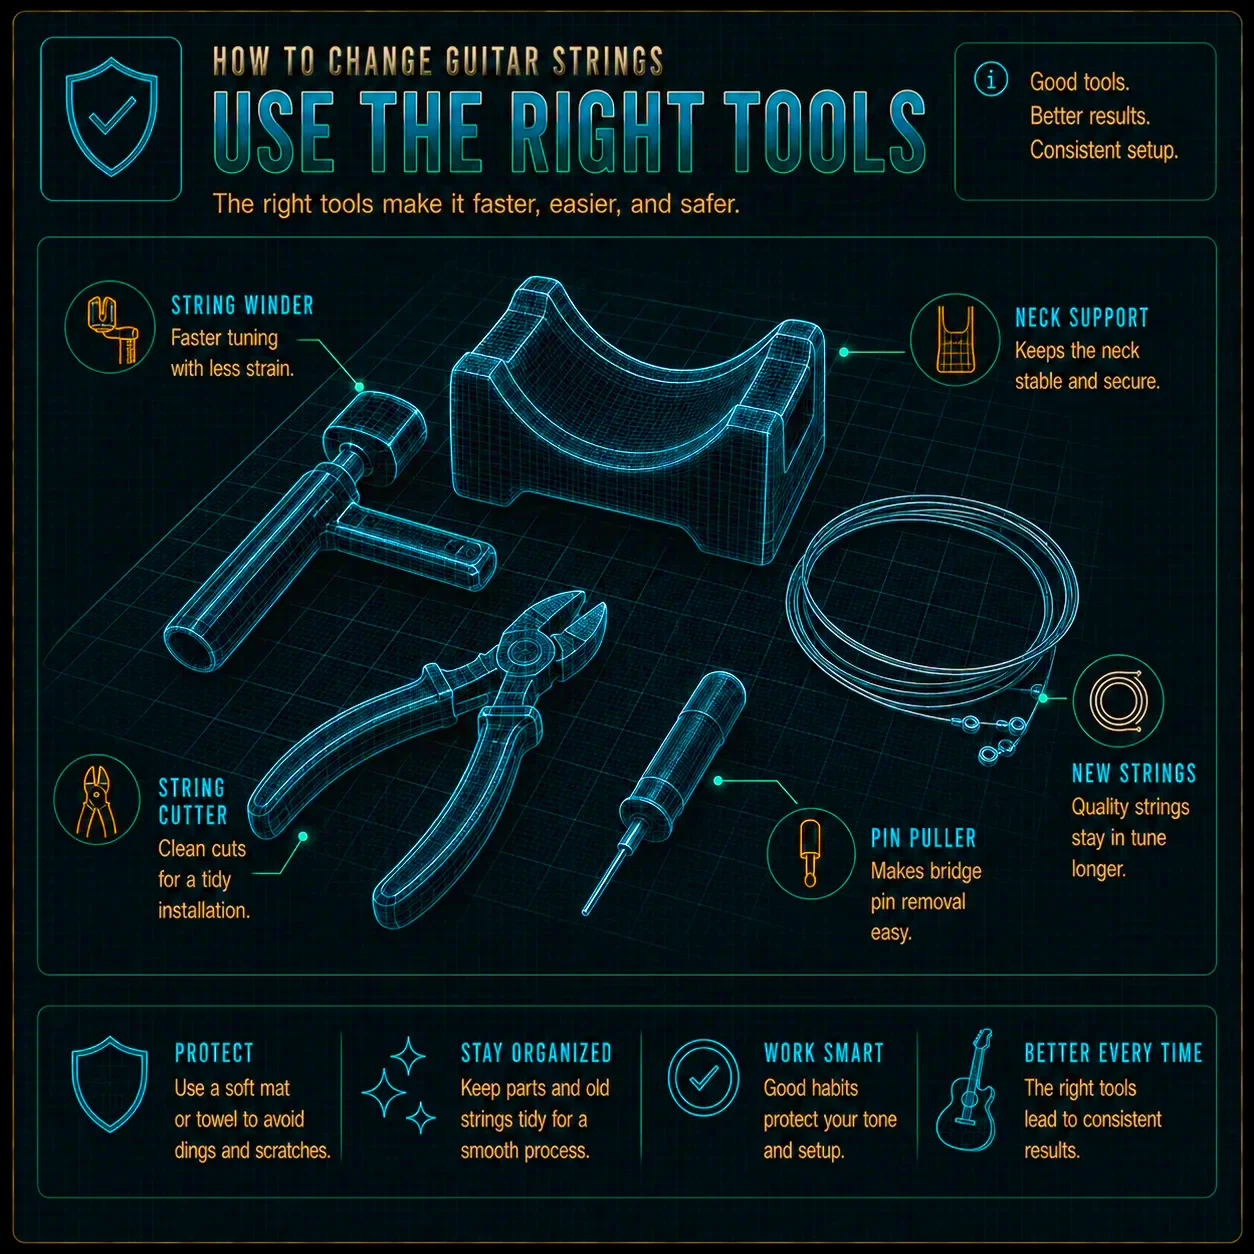
The right tools make restringing easier and safer. A string winder, cutter, and neck support can save time while helping the guitar stay stable on the bench. That is especially helpful if you restring often. If you are putting a kit together, the Guitar Care Kit covers the winder, cutter, and cloths worth owning.
Update setup if the gauge changes
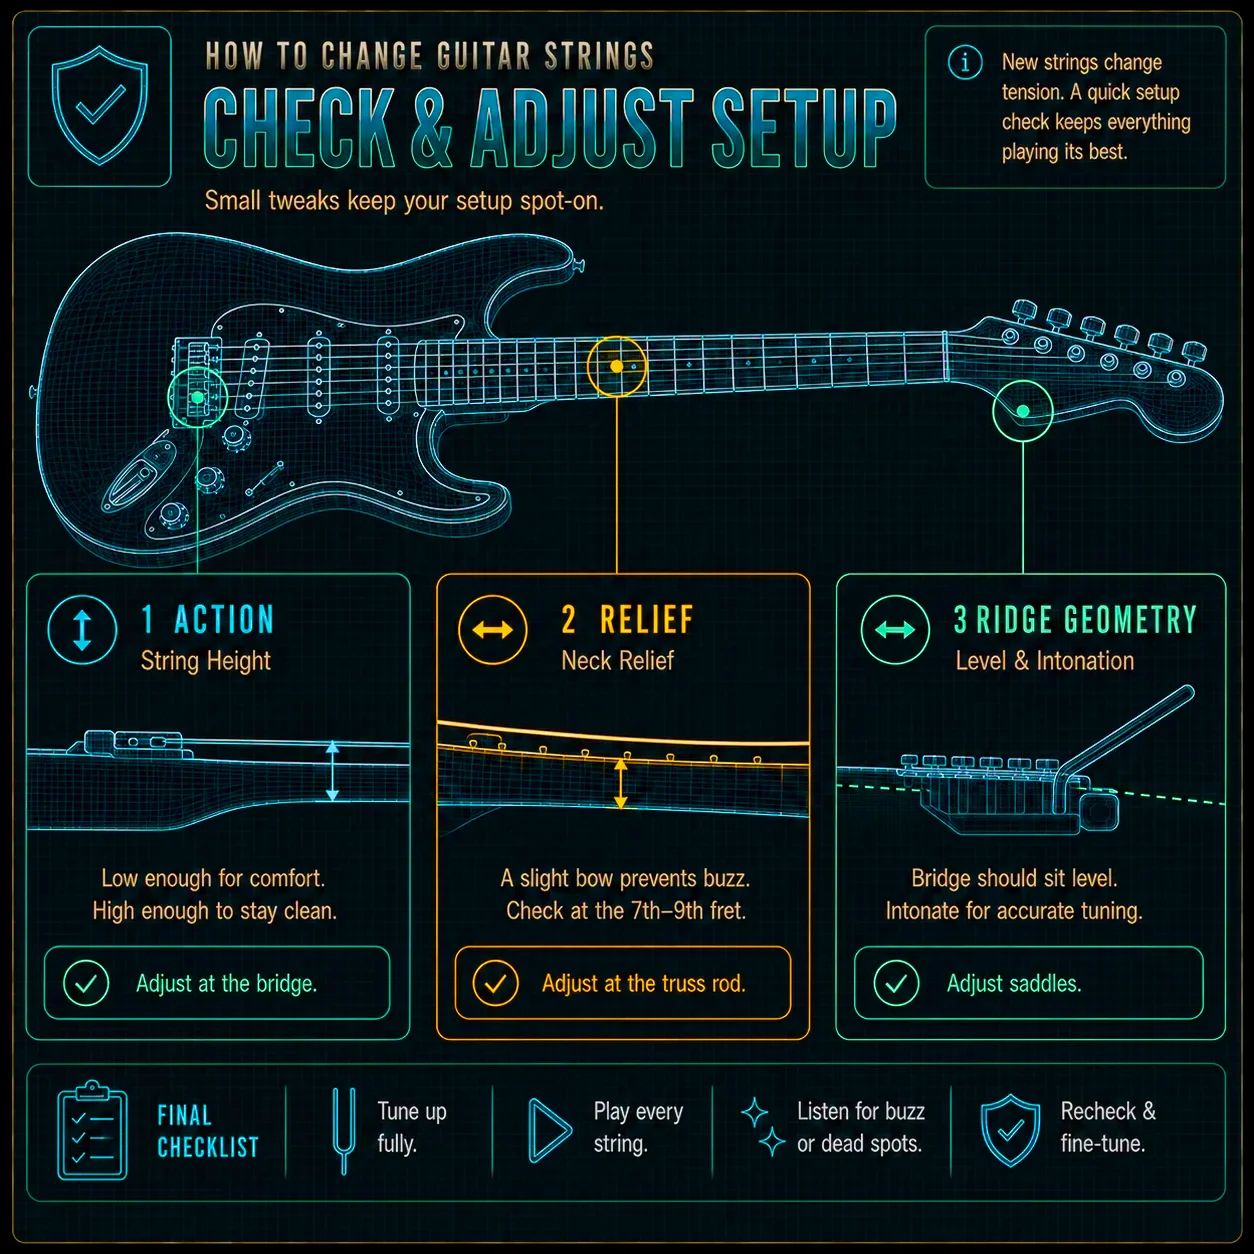
If the new string set is a different gauge, the setup may not feel the same afterward. Tension changes can affect neck relief, string height, and tuning stability. That is normal, not a sign that anything is broken.
This is where your setup tools matter. If the guitar feels different after the restring, move into the setup checks instead of assuming it will sort itself out. That keeps the instrument aligned with the strings you actually installed.
Use the assistant
This is exactly where the String Change Assistant fits. It helps with wrap counts and clean restringing steps so the new strings seat properly. If you changed gauge or the guitar feels different afterward, the setup tools can help you recalibrate.
That combination is what makes the workflow useful. First you get the strings on correctly, then you confirm the guitar still plays the way it should. It turns restringing into a controlled maintenance routine instead of a guess.
Restringing now? Get clean wrap counts and stable, well-seated strings.
Open String Change Assistant →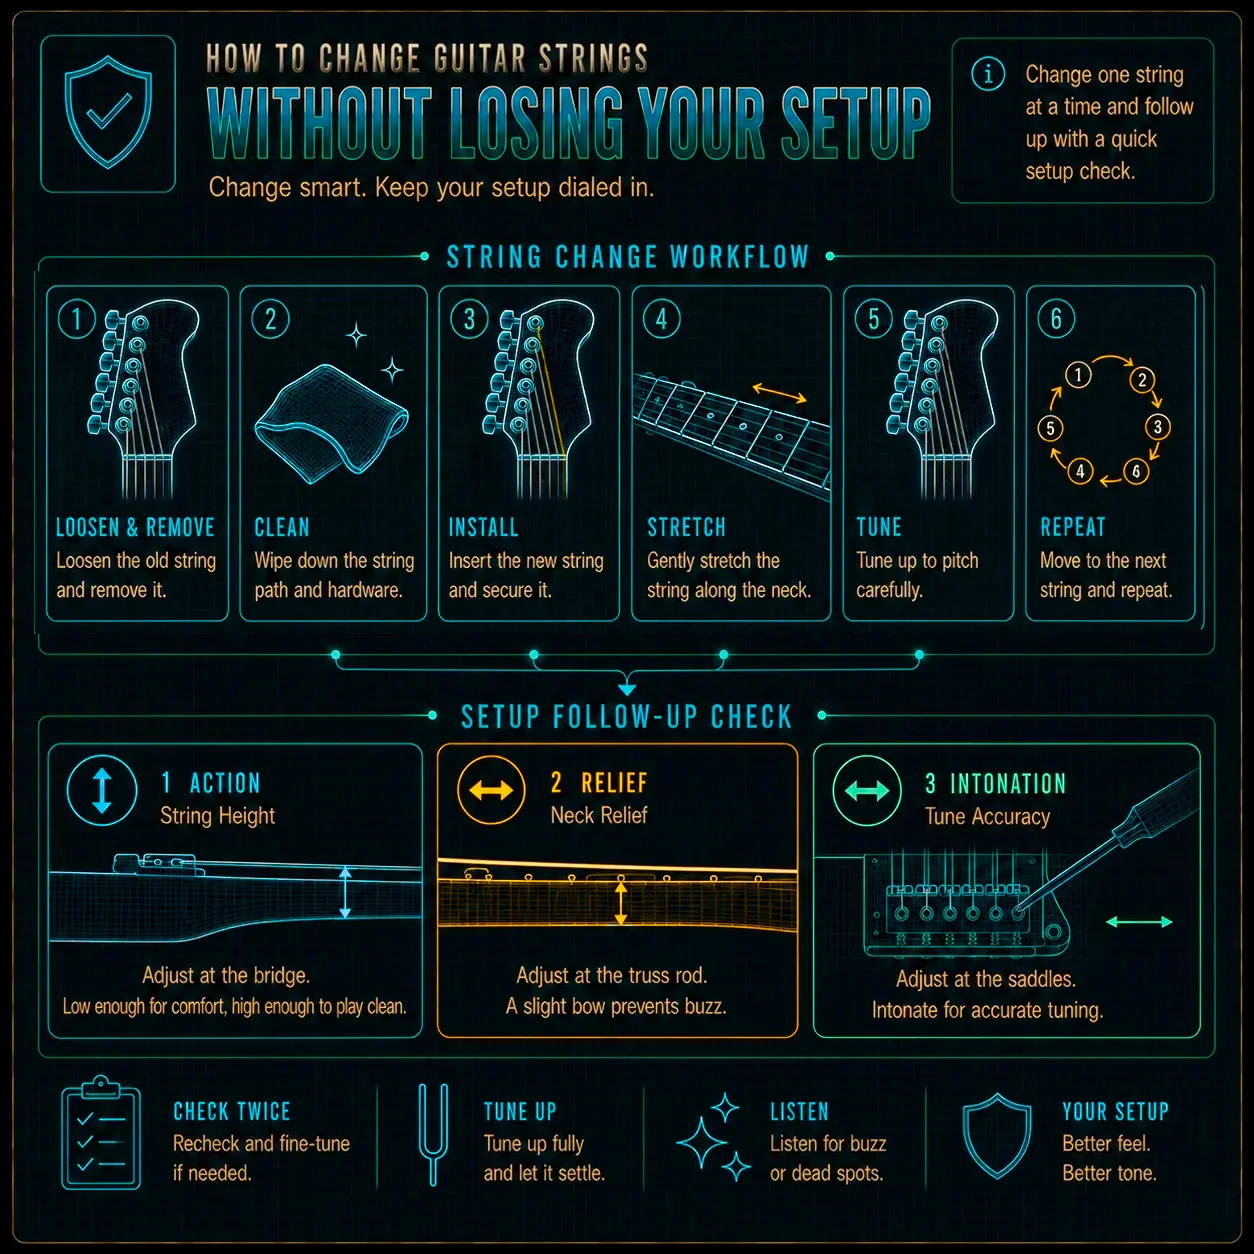
The Pocket Roady order
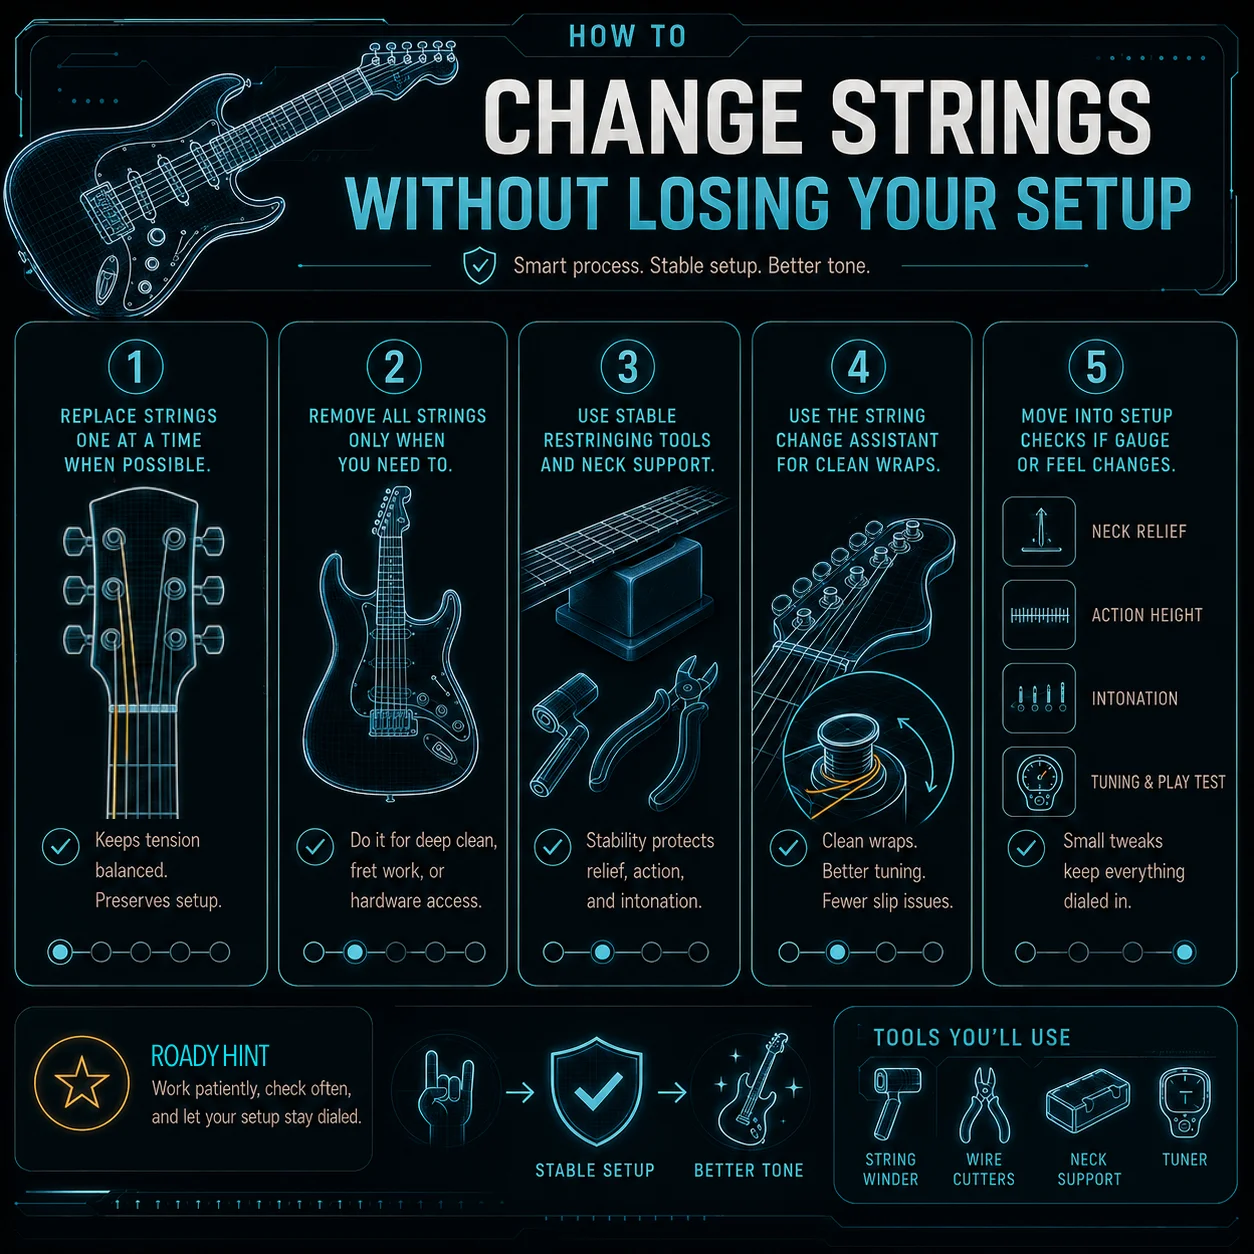
Here is the simplest workflow — start at the top and work your way down:
Replace strings one at a time when possible.
Remove all strings only when you need to.
Use stable restringing tools and neck support.
Use the String Change Assistant for clean wraps.
Move into setup checks if gauge or feel changes.
That sequence keeps the topic calm and practical. A careful restring protects both tone and setup.
Where to go next
If you want to change strings without disturbing your setup, the best habit is to work slowly and keep tension changes controlled. The strings and the setup are connected, so it pays to treat them as one system.
Want to restring without losing your setup? Use the String Change Assistant for clean wrap counts, then move into your setup tools if the gauge or feel changes.