The Hand Independence Blueprint
Almost every clean-playing frustration — a chord that buzzes, a fast run that smears, a note you muted by accident — comes back to the same root cause: your hands getting in each other's way. This is the map for sorting that out.

Hand independence is the quiet skill sitting underneath clean playing, and almost nobody practices it on purpose. We tend to chase songs, speed, and licks — and then wonder why a simple chord won't ring or a run sounds muddy. More often than not, the answer isn't more practice. It's the two hands learning to do their own separate jobs without interfering with each other.
That's all "independence" really means here: your fretting hand and your picking hand each doing one clear thing at a time, plus each fretting finger pulling its own weight instead of dragging its neighbours around. Once you start hearing your playing that way, "play cleaner" stops being a vague goal and turns into a handful of small, fixable jobs.
You don't have to read this whole thing top to bottom. Skim to the part that matches what's bugging you right now, and start there. The map at the bottom points to every piece.
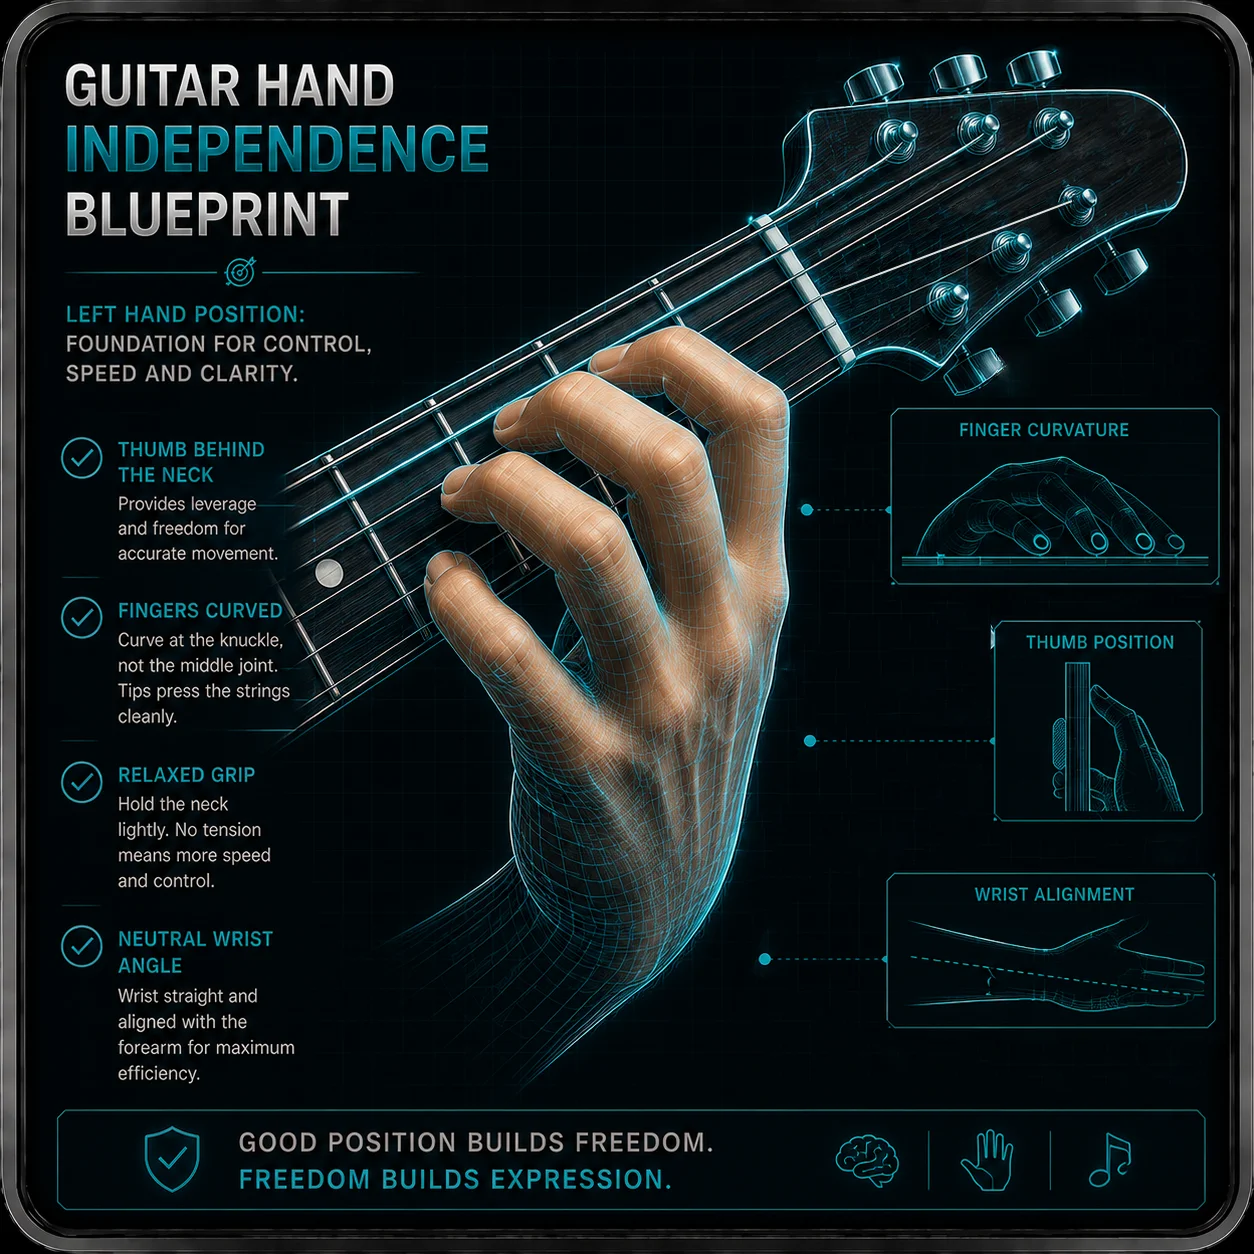
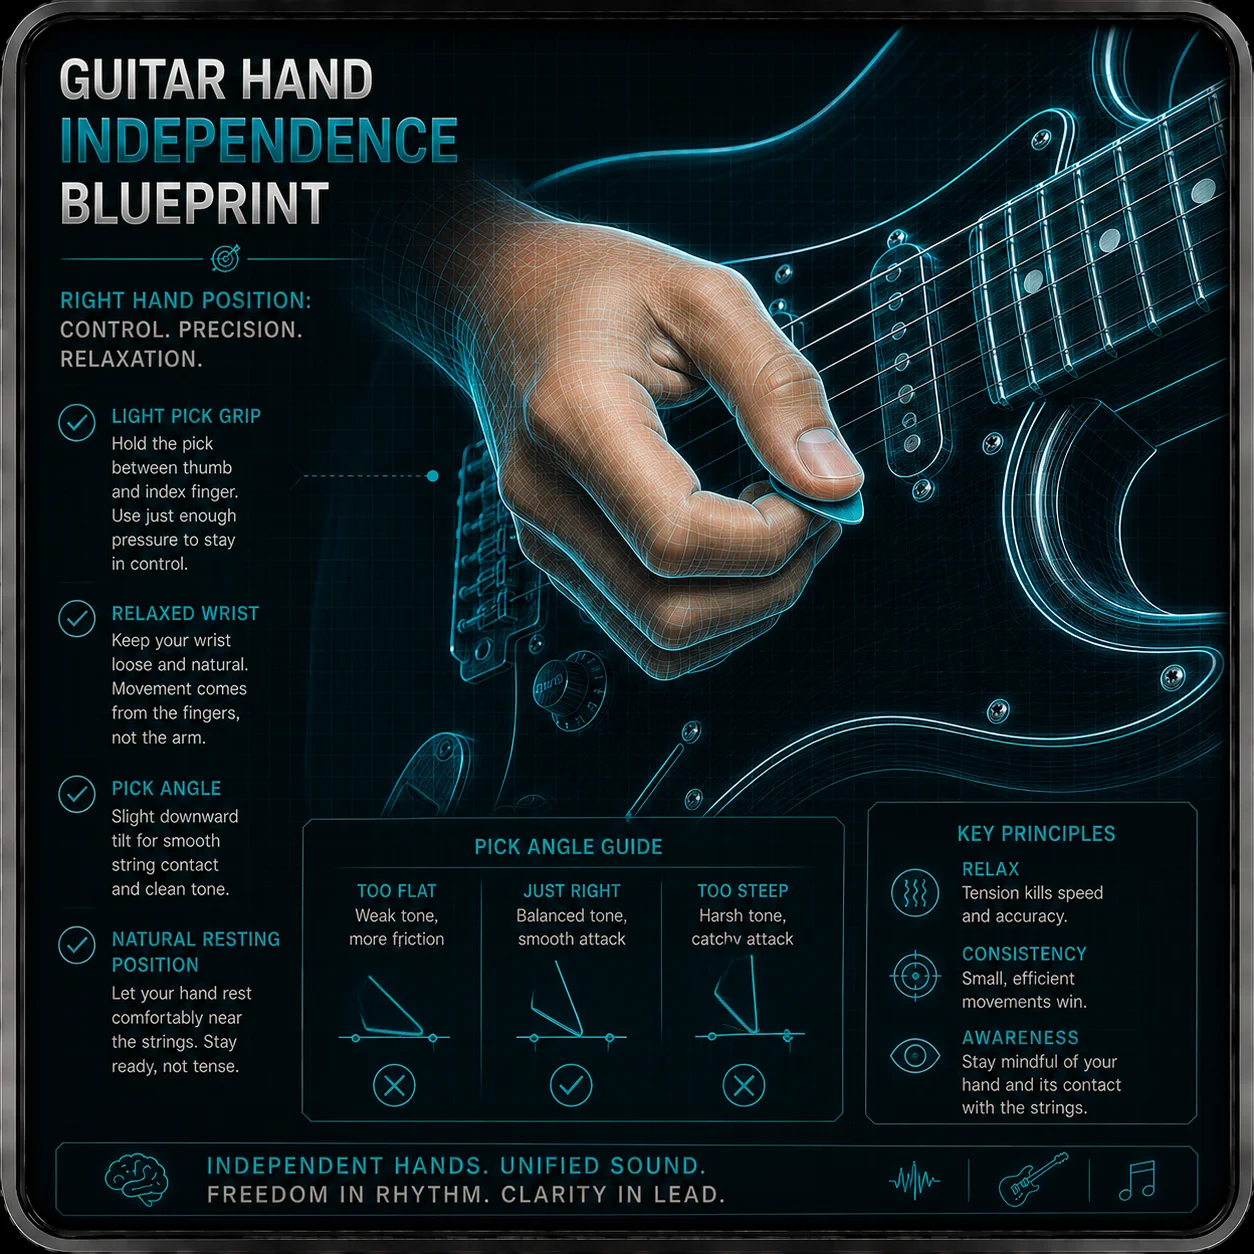
Start with a loose, honest default
Before two hands can be independent, each one needs a relaxed starting point it can return to. Tension is the enemy of independence — a clenched hand can't move one finger without moving the rest. These two come first.
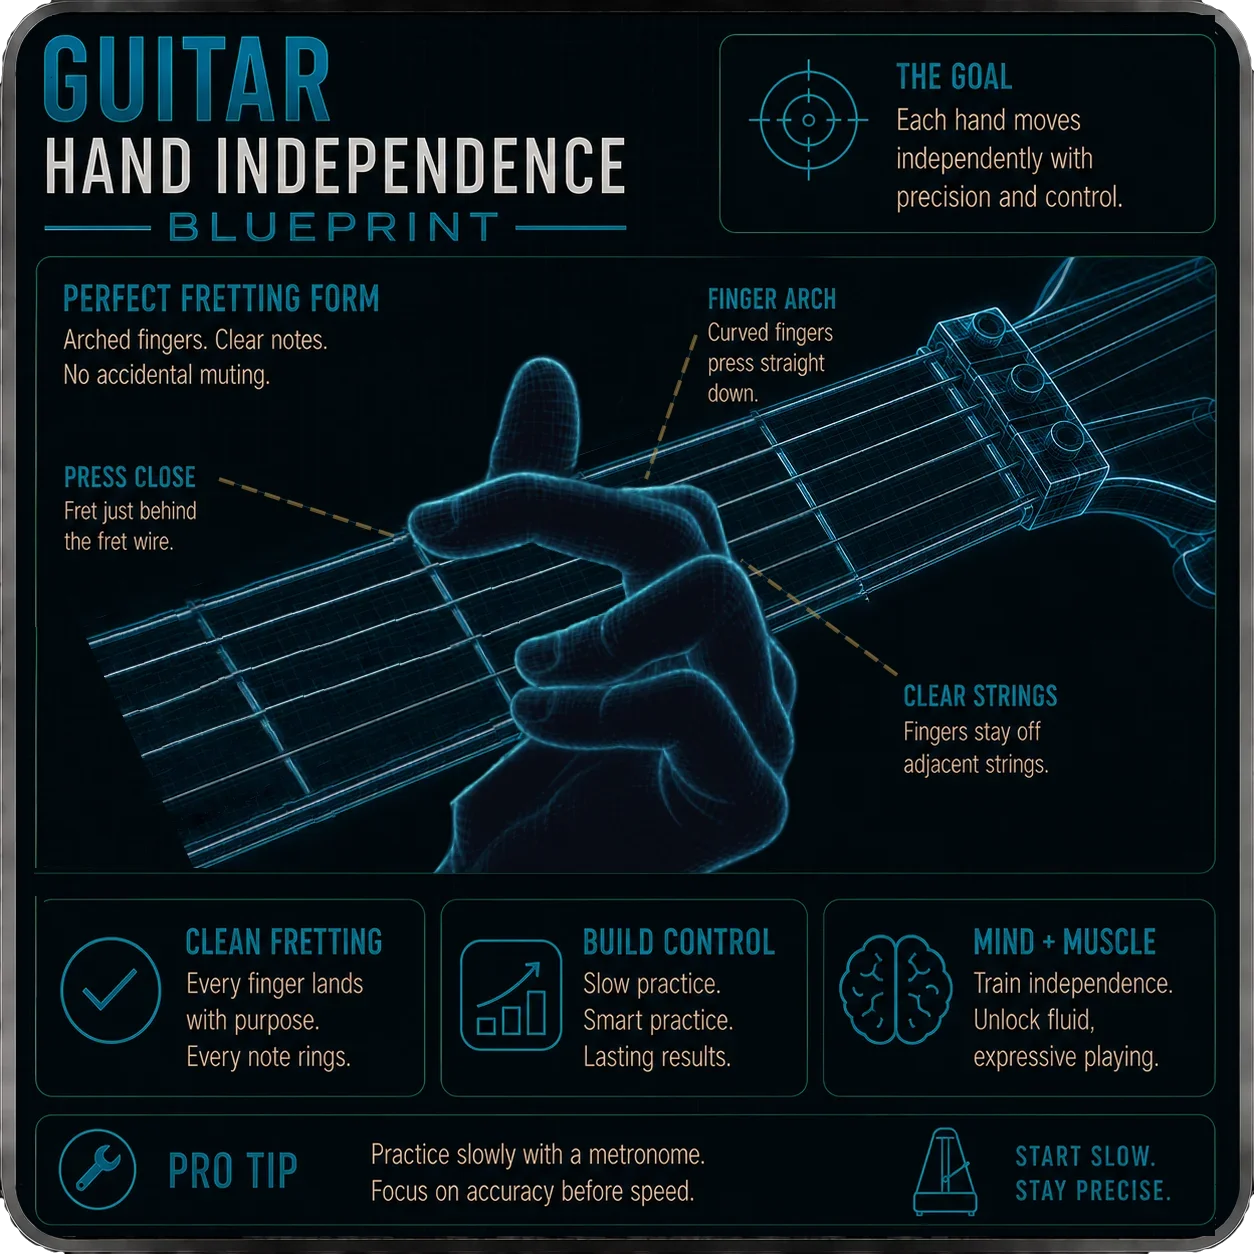
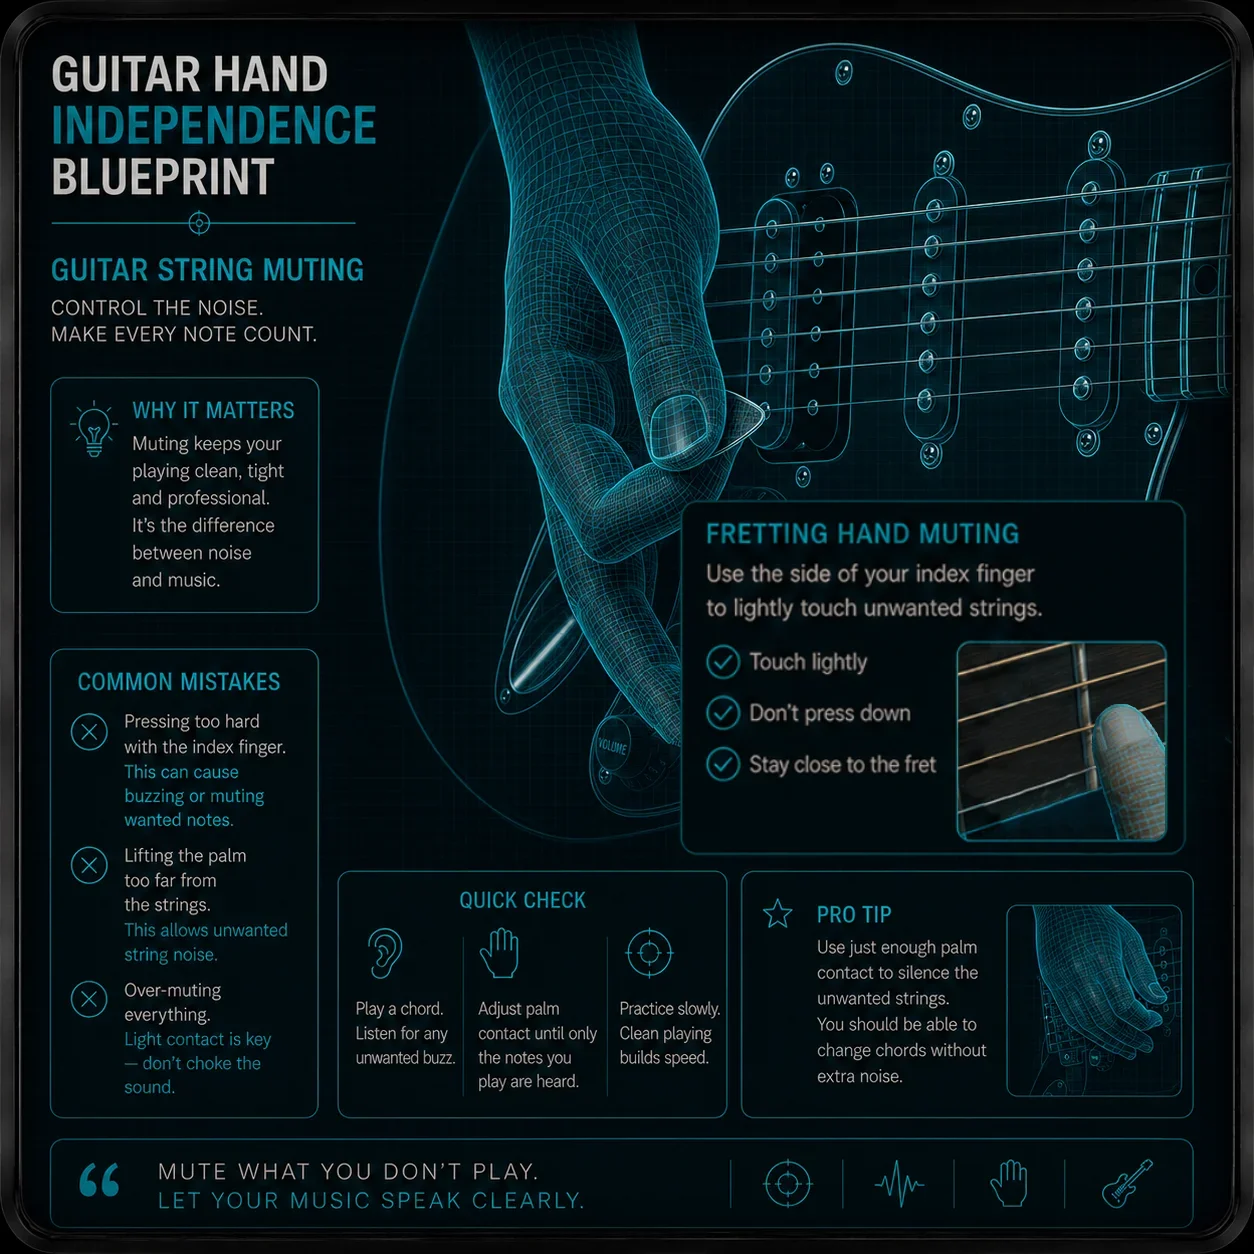
Let every note ring — and only the ones you want
This is the heart of "clean": each fretting finger pressing exactly what it should, and nothing it shouldn't. When a chord buzzes or a stray string rings out, this is almost always where it lives.

Make the expressive stuff land in tune
Bends and vibrato are where "clean" meets "in tune." A bend that stops short or a wobbly vibrato isn't a technique problem so much as an ear-and-control problem — and that's very trainable.
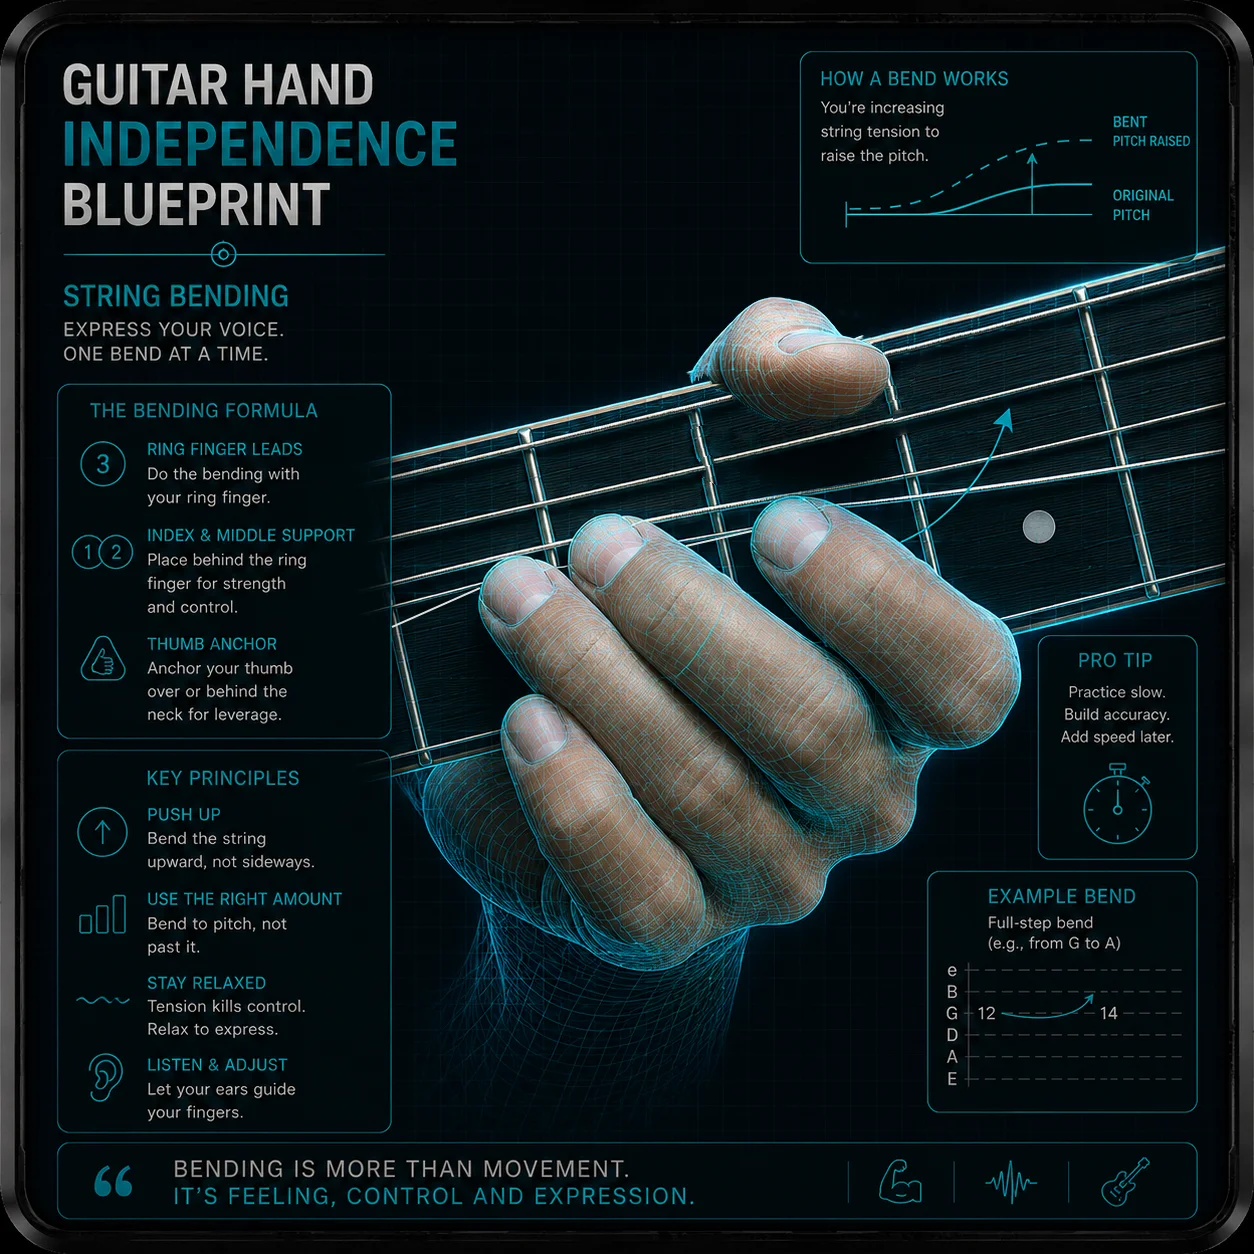
🎧 Train the ear behind the bend
Bending in tune is half technique, half ear. The Guitar Ear Trainer lets you hear a target pitch and match it, and the Online Guitar Tuner is a quick way to check whether your bends are landing where you think they are.
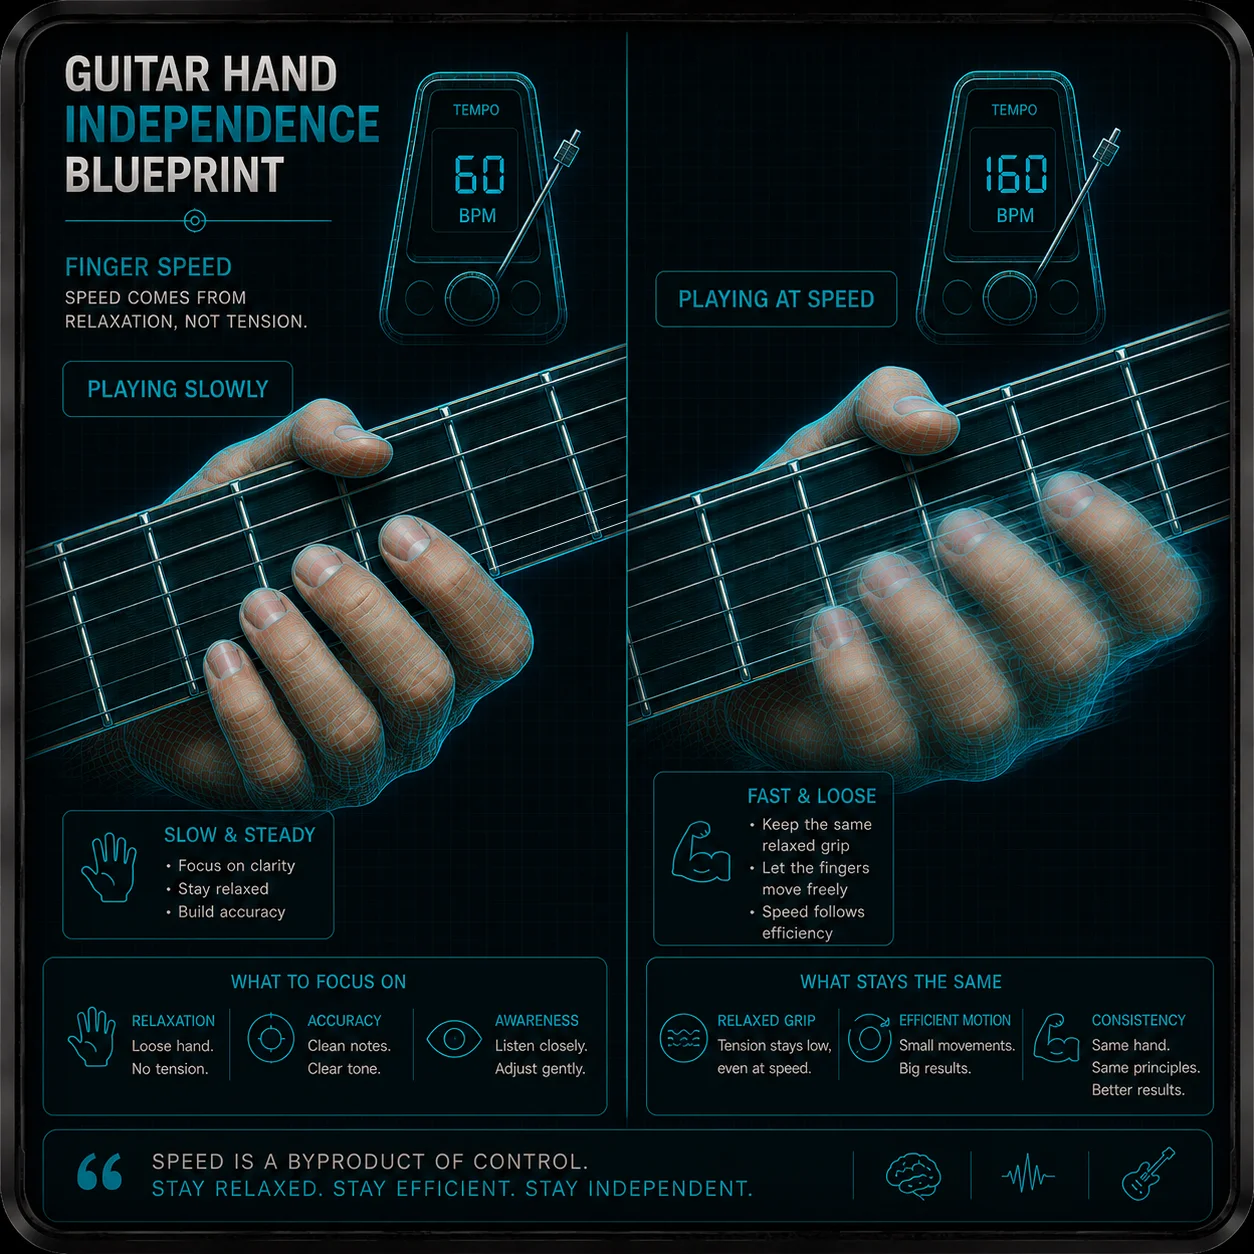
Let speed come from staying relaxed
Speed is mostly a byproduct of clean, relaxed motion — not something you force. Most players who feel "stuck" at a tempo are tensing up, not lacking talent. This is the unlearning.
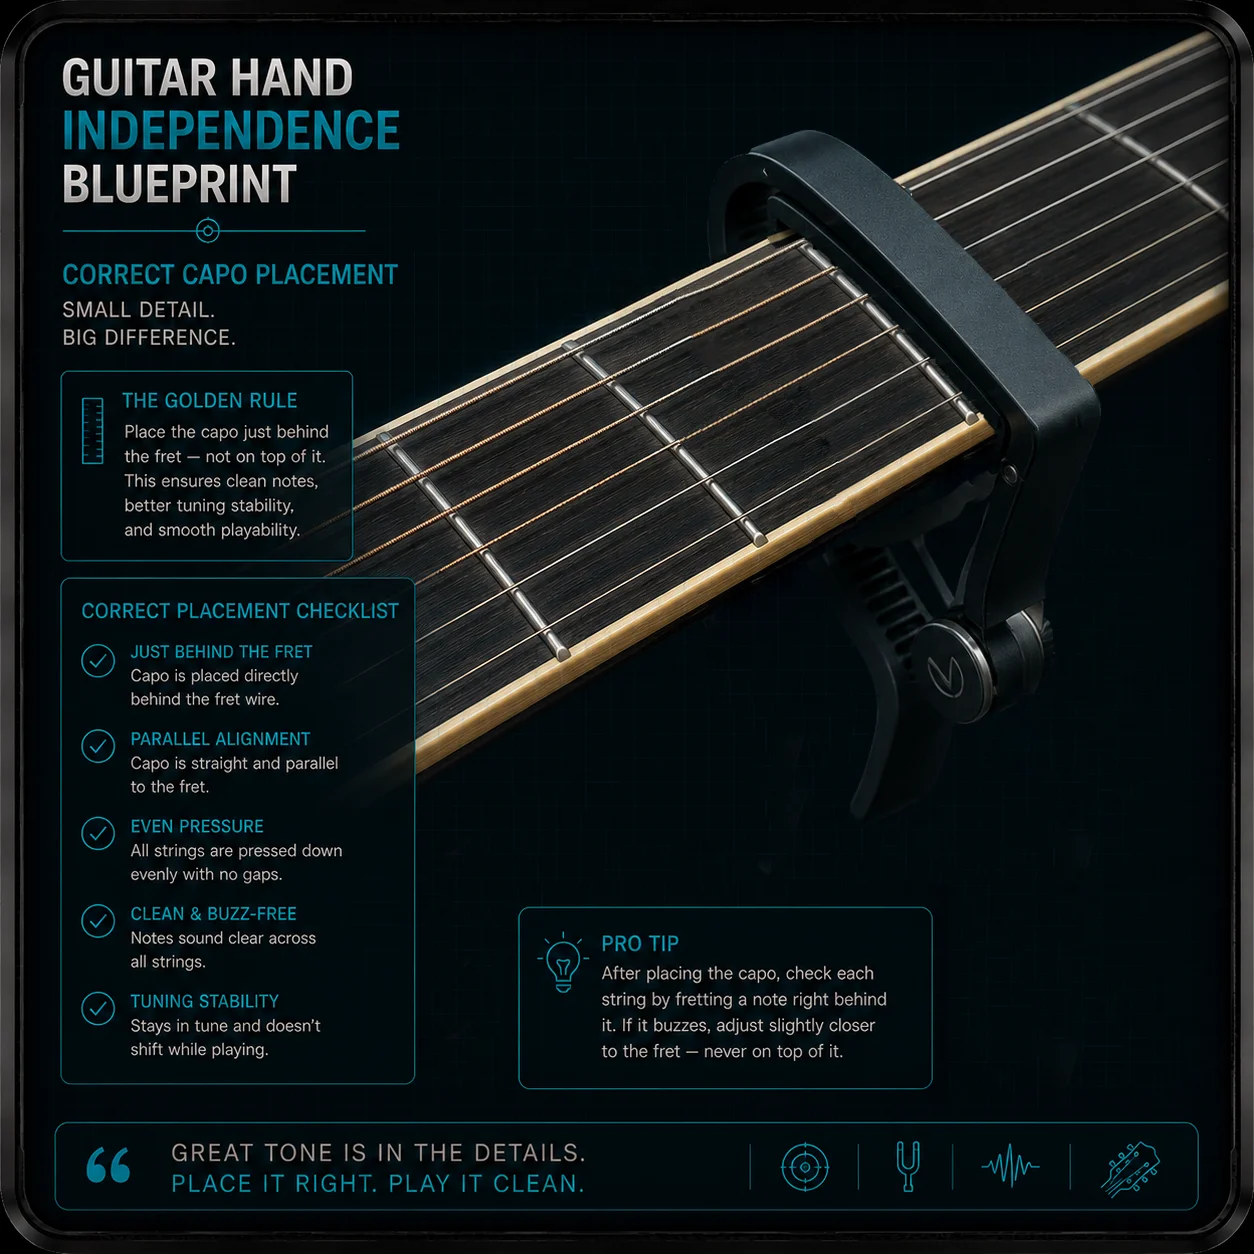
Where your hands meet the setup
Sometimes the issue isn't your hands at all — it's the guitar fighting back. A capo is the classic example: clamp it wrong and even perfect hands play out of tune.
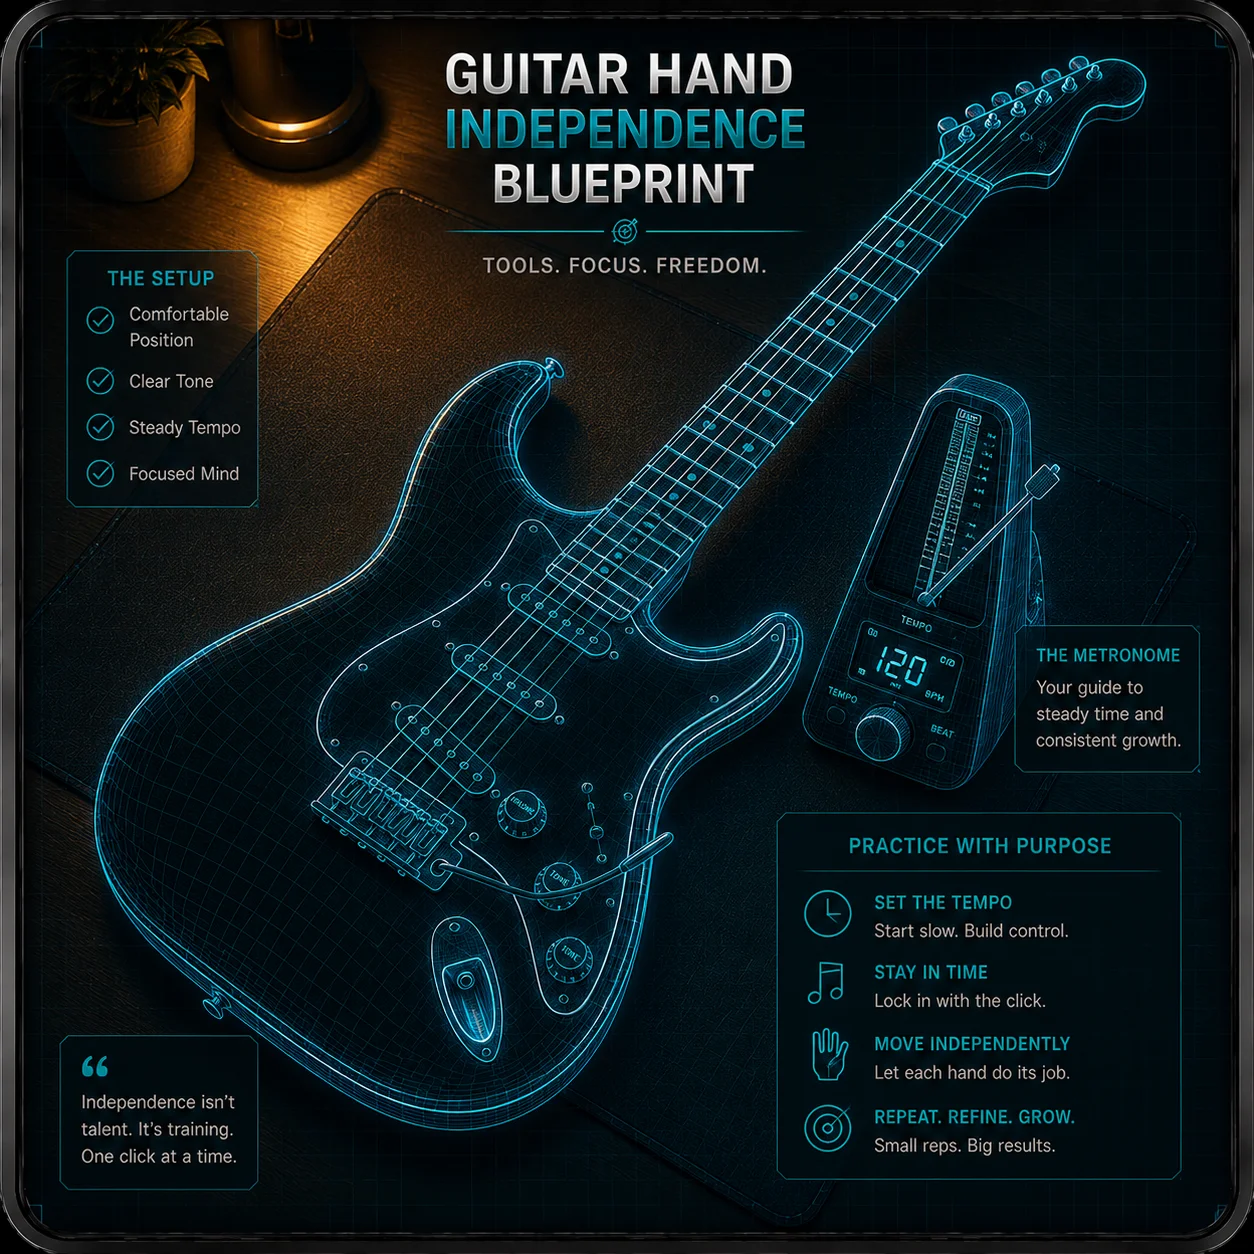
A simple way to practice any of this
Whatever piece you're working on, the same frame works: get it clean first, then fast. Isolate one hand's job, get that steady, then add the other hand back in. Slow enough to play it perfectly is the right speed — even if "slow" feels almost silly at first.
A metronome turns "practice more" into "practice on purpose." Set it slow enough that every note is clean, sit there until it's easy, then nudge it up a notch. The Micro-Groove Metronome is built for exactly this kind of patient, clean ramp.
The map — pick what's biting you
The whole Blueprint, in order. There's no rule that says front to back — go straight to the one you need.
- 1Clean Hand Position
- 2Keep Your Picking Hand Relaxed
- 3Make Your Chords Ring Clean
- 4Stop Accidental String Noise
- 5Double Stops
- 6Bending & Vibrato in Tune
- 7Build Picking Speed Without Losing Cleanliness
- 8Use a Capo Without Throwing Off Intonation
Ready to put the practice frame to work? Start slow, stay clean, and let the speed catch up on its own.
Open the Micro-Groove Metronome →Tools That Pair With This